Endgame Progression Guide: Difference between revisions
imported>BG-Wiki import Imported from the BG-Wiki archive (CC BY-NC-SA 3.0) |
PegasusAdmin (talk | contribs) m Rebrand: BGWiki -> PegasusXI Wiki |
||
| Line 462: | Line 462: | ||
**Apururu is an incredibly strong healer, often considered one of the best available. She has effectively unlimited MP - she will use [[Convert]], has a native [[Regain]] for free TP which she'll also use to recover her MP, and will even use [[Devotion]] to recover the MP of allies. Furthermore, she has a lot of powerful AOE healing, making her great for tough fights that hit your whole party. | **Apururu is an incredibly strong healer, often considered one of the best available. She has effectively unlimited MP - she will use [[Convert]], has a native [[Regain]] for free TP which she'll also use to recover her MP, and will even use [[Devotion]] to recover the MP of allies. Furthermore, she has a lot of powerful AOE healing, making her great for tough fights that hit your whole party. | ||
*[[ | *[[PegasusXI Wiki:Trusts#Yoran-Oran_(UC)|Yoran-Oran (UC)]] - Join Yoran-Oran's [[Unity Concord]]. | ||
**Yoran is tied with Apururu for "best healer" and which one you choose often coming down to personal preference. Like Apururu, he too has near limitless MP, however he swaps out her AOE healing potential for better survivability - he has very high [[Magic Evasion]] meaning he'll very often dodge status effects, and will keep [[Stoneskin]] up on himself. | **Yoran is tied with Apururu for "best healer" and which one you choose often coming down to personal preference. Like Apururu, he too has near limitless MP, however he swaps out her AOE healing potential for better survivability - he has very high [[Magic Evasion]] meaning he'll very often dodge status effects, and will keep [[Stoneskin]] up on himself. | ||
| Line 503: | Line 503: | ||
**Gadalar, like Fablinix, loves to spam AOE damage - fire spells, in this case. If you need to farm up large groups of enemies, he's another good choice. | **Gadalar, like Fablinix, loves to spam AOE damage - fire spells, in this case. If you need to farm up large groups of enemies, he's another good choice. | ||
*[[ | *[[PegasusXI Wiki:Trusts#Romaa_Mihgo|Romaa Mihgo]] - Have the Key Item [[Bundle of half-inscribed scrolls]], complete the quest [[At Journey's End]], then talk to [[Romaa Mihgo]] in [[Windurst Waters (S)]] at (G-11). | ||
**Romaa Mihgo is the only trust that will actually [[Steal]] items for you! Specifically she will use [[Aura Steal]] to remove buffs from enemies, and any items stolen while doing so will be added to your inventory. This won't be useful very often, but when you DO need to steal something she can be a big help. | **Romaa Mihgo is the only trust that will actually [[Steal]] items for you! Specifically she will use [[Aura Steal]] to remove buffs from enemies, and any items stolen while doing so will be added to your inventory. This won't be useful very often, but when you DO need to steal something she can be a big help. | ||
| Line 562: | Line 562: | ||
**Ferreous Coffin is a unique healer in that he is the only trust that can cast [[Raise III]] on fellow party members. This can be extremely useful if you're running content with a friend or two! Even if you're not using him as your primary healer trust, it's incredibly valuable to swap out a trust for him, pull over a weak mob to fight, then wait for Coffin to raise your dead friend. He also has a higher-than-normal success rate for [[Cursna]] which can be very valuable for dealing with [[Doom]], though he'll only cast it on whoever has hate. | **Ferreous Coffin is a unique healer in that he is the only trust that can cast [[Raise III]] on fellow party members. This can be extremely useful if you're running content with a friend or two! Even if you're not using him as your primary healer trust, it's incredibly valuable to swap out a trust for him, pull over a weak mob to fight, then wait for Coffin to raise your dead friend. He also has a higher-than-normal success rate for [[Cursna]] which can be very valuable for dealing with [[Doom]], though he'll only cast it on whoever has hate. | ||
*[[ | *[[PegasusXI Wiki:Trusts#Monberaux|Monberaux]] - Redeem 480 [[A.M.A.N._Validator|Deed of Heroism]] (minimum 12 months' worth of completing monthly objectives) | ||
**Monberaux is a unique trust, as he is the only "Chemist" in the game - he uses unique potion-themed skills to heal. He's quite a powerful healer, one of the strongest in the game. His heals are instant, he is functionally immune to the [[Paralyze]] status effect, and his healing skills aren't prevented by either [[Silence]] nor [[Amnesia]] - making him incredibly strong against enemies that use those statuses (such as [[:Category:Imp|Imps]]). Furthermore, if you donate gil to [[Monberaux]] in [[Upper Jeuno]] (G-10) then this will buff up the Monberaux trust for the rest of the week, turning his status removal skills into AOE. He also has a variety of status buffs he can provide! His only real downside is that he lacks reliable AOE healing - he does gain an AOE heal if you donate an [[Elixir]] and/or [[Hi-Elixir]] to him in Jeuno, but each of those only provides '''one''' use of his AOE healing before needing to be restocked, meaning you'll need to constantly supply him with them for this to be reliable. Finally, his Protect/Shell only lasts a few minutes - he'll reapply it quickly, but this does mean you'll have a higher chance of getting caught without them, especially between fights. | **Monberaux is a unique trust, as he is the only "Chemist" in the game - he uses unique potion-themed skills to heal. He's quite a powerful healer, one of the strongest in the game. His heals are instant, he is functionally immune to the [[Paralyze]] status effect, and his healing skills aren't prevented by either [[Silence]] nor [[Amnesia]] - making him incredibly strong against enemies that use those statuses (such as [[:Category:Imp|Imps]]). Furthermore, if you donate gil to [[Monberaux]] in [[Upper Jeuno]] (G-10) then this will buff up the Monberaux trust for the rest of the week, turning his status removal skills into AOE. He also has a variety of status buffs he can provide! His only real downside is that he lacks reliable AOE healing - he does gain an AOE heal if you donate an [[Elixir]] and/or [[Hi-Elixir]] to him in Jeuno, but each of those only provides '''one''' use of his AOE healing before needing to be restocked, meaning you'll need to constantly supply him with them for this to be reliable. Finally, his Protect/Shell only lasts a few minutes - he'll reapply it quickly, but this does mean you'll have a higher chance of getting caught without them, especially between fights. | ||
*[[ | *[[PegasusXI Wiki:Trusts#Cherukiki|Cherukiki]] - Complete the CoP Mission [[One to be Feared]] | ||
**Cherukiki is a great backup / secondary healer for tougher fights that one healer just can't keep up with. She tends to provide lots of strong [[Regen]] effects before pure heals, and she will keep her distance from enemies - keeping her relatively safe from AOE damage. Her main weakness is her poor MP management, in long fights she'll probably struggle to keep up with MP demand. | **Cherukiki is a great backup / secondary healer for tougher fights that one healer just can't keep up with. She tends to provide lots of strong [[Regen]] effects before pure heals, and she will keep her distance from enemies - keeping her relatively safe from AOE damage. Her main weakness is her poor MP management, in long fights she'll probably struggle to keep up with MP demand. | ||
| Line 1,432: | Line 1,432: | ||
|} | |} | ||
To get started, you'll first need to have unlocked the following Trusts: [[ | To get started, you'll first need to have unlocked the following Trusts: [[PegasusXI Wiki:Trusts#Naji|Naji]], [[PegasusXI Wiki:Trusts#Ayame|Ayame]], [[PegasusXI Wiki:Trusts#Volker|Volker]], [[PegasusXI Wiki:Trusts#Iron Eater|Iron Eater]], [[PegasusXI Wiki:Trusts#Excenmille|Excenmille]], [[PegasusXI Wiki:Trusts#Curilla|Curilla]], [[PegasusXI Wiki:Trusts#Trion|Trion]], [[PegasusXI Wiki:Trusts#Kupipi|Kupipi]], [[PegasusXI Wiki:Trusts#Nanaa Mihgo|Nanaa Mihgo]], [[PegasusXI Wiki:Trusts#Ajido-Marujido|Ajido-Marujido]], and finally [[PegasusXI Wiki:Trusts#Shantotto|Shantotto]]. You'll also need to have completed the CoP mission [[Dawn]], and have access to [[Ru'Aun Gardens]]. Once you've unlocked all of those, go speak with [[Jamal]] in [[Ru'Lude Gardens]] (H-5) to get started on the quest, which will appear in your RoE logs under Other > Quests 3. Simply accept the RoE quest, then go kill the corresponding AA HTBF, then report back to Jamal to receive the cipher and unlock the next AA RoE quest. | ||
The fights themselves may prove too challenging to solo depending on your job, but you likely will be okay if you stick to Very Easy difficulty. The main thing to watch out for is that you don't pull hate away from your trust tank. All the AAs will try to skillchain, which can take you down very quickly. Additionally, the AA Mithra can Charm you, even if she has a pet out. The only other notable danger is AA Hume's ability to use [[Mijin Gakure]], which WILL kill you. I recommend bringing along [[Reraiser]] and [[Hi-Reraiser]] items along just in case, and when he starts getting low (20-30%) back up to at least 20' away and wait for him to pop it on your trusts. | The fights themselves may prove too challenging to solo depending on your job, but you likely will be okay if you stick to Very Easy difficulty. The main thing to watch out for is that you don't pull hate away from your trust tank. All the AAs will try to skillchain, which can take you down very quickly. Additionally, the AA Mithra can Charm you, even if she has a pet out. The only other notable danger is AA Hume's ability to use [[Mijin Gakure]], which WILL kill you. I recommend bringing along [[Reraiser]] and [[Hi-Reraiser]] items along just in case, and when he starts getting low (20-30%) back up to at least 20' away and wait for him to pop it on your trusts. | ||
Revision as of 21:46, 29 August 2026
|
So you've finally hit level 99. Congratulations! What now? You're probably overwhelmed by all the endgame content, and have no idea where to start or what's accessible.
This guide will explain in detail what various endgame events are, what you can get out of them, and when you can take part in them. This guide is set up to walk you through from the first minute as a level 99 all the way to Best In Slot (BIS) gear.
It will also assume you have no knowledge of FFXI's endgame events, and will try to aim towards doing as much as possible solo.
This guide is roughly arranged in a power level order to begin attempting an event, but not with the intent of 100%ing each entry before moving on to the next. Get a few pieces of gear, or make a bit of progress, and the snowball will start rolling faster than you think.
You want to always be moving forward. Try not to get bogged down in any one event. You can always come back to farm gear later, and it'll probably go much faster later with more gear under your belt.
Each section of this guide is collapsed by default to make reading easier. Click the [Expand] button on the right-side of any section to expand it for more information.
A Quick Reminder
Before we get started in the guide proper, have you started on your Coalition Assignments and Mog Garden yet? There is more info on these in the Initial Gearing section below, but they take months of real-life time to max out. If you haven't started on them yet, it's a great idea to do so as soon as you can!
Now's also a good time to make sure you have started your timers for Traverser stones for Abyssea and Voidstones for Voidwatch. Both of those accumulate slowly in real time, so you want to get the timers rolling ASAP.
Resources
| Overview - click on "Expand" to read more --> | |
|
This guide is hosted on the BG Wiki - generally the best resource for all content in the current endgame. However, it tends to lack information or detail on older content - for that, I would recommend FFXIclopedia. As a rule of thumb, any content from before the Seekers of Adoulin expansion will probably have more detail on FFXIclopedia, and any content after that will likely have more detail here on BGwiki. For reference, areas in the "Middle Lands" around the three main nations, areas in the near east of Aht Urghan, "Shadowreign" areas in the past, and all Abyssea areas are generally pre-Adoulin content. I would also highly recommend FFXIAH for easily and quickly looking up prices of items on your server - both in the Auction House (AH) and in players' bazaars. There are some YouTubers with useful guides for players new and old:
If you have a favorite FFXI YouTube channel that you don't see mentioned here, feel free to add it! The more the merrier. | |
Deciding on your Jobs
| Overview | |
|
The first major decision is deciding which jobs to play. And yes, that's jobs plural - it's generally not a good idea to focus on just one single job for your entire FFXI career. NOTE - A job with more positive points is not necessarily better than a job with fewer, and a job with more negative points is not necessarily worse than a job with fewer. The positive/negative bullet points are simply included to let you know what to expect from a job. | |
| Damage Dealers | |
|
There are a lot of options to pick from when it comes to dealing damage in FFXI. Unfortunately, dealing damage is also very popular with the existing playerbase, many of which have been playing for a looooong time and are geared to the nines. Being a Damage Dealer (often abbreviated "DD" or "DPS") can be very fun, but know that there will be a lot of competition, and as a new player you may find it difficult to get invites to groups that aren't already friends of yours. If you play a Damage Dealer, expect to...
Heavy Physical Damage Dealers (Heavy DD / DPS)
Light Physical DD
File:Laksamana's Hat icon.pngCorsair - A great party support with very strong (if random) buffs, COR can also deal respectable damage. In very high demand for parties. They dual wield Daggers or Swords, and use Guns for ranged damage.
Notes: At higher gear levels, Bard can also function as a light DPS with melee dagger attacks and weapon skills. Magic DD
Notes: While not traditional casters, Ranger and Corsair can both deal big chunks of magic damage from a distance with magical Weapon Skills. | |


| Tanks | |
|
Tanks are in charge of keeping and holding enemy hate while not dying. Sometimes they can bring some good damage to the table, too. A lot of content wants a tank, and as such they're in high demand. However, you'll be expected to know the content inside and out, and will face high gear requirements at top levels of play. If you play a tank, expect to...
Notes: Warriors, Monks, and Dancers can also function as tanks in emergencies or specialized situations. (See also Regal Gloves, and please do let the entire world know if you actually make them work. It's my white whale.) | |


| Supports | |
|
The primary role of support jobs is to buff party members or debuff enemies. These jobs are the strongest thing around and key members of any party - getting party invites will likely be very easy. Unfortunately, most of them have a lot of gear requirements to work at a high level, and some require good knowledge of the content being played. If you play a support, expect to...
File:Laksamana's Hat icon.pngCorsair - Gamblers by nature, CORs play a quick push-your-luck game to give AOE buffs to their party. Bad luck can cause a Bust though, which removes the buff from the party (and debuffs you). They can also deal very good physical damage. In very high demand.
Backup Support
| |

| Healers | |
|
It's the healers' job to keep everyone in the party alive. They are mandatory for most high-end content, and thus in high demand. That being said, healers generally tend to struggle solo due to being squishy and having very low damage. They also are expected to know quite a bit about the endgame, knowing what debuffs to cure in each fight and which mechanics to respect. If you play a healer, expect to...
Backup Healer
| |

| Party Composition | |
|
When not solo, you'll usually be in a party of 6 players (total, including you), or an alliance of 18 players (three 6-player parties). The jobs that make up these parties and alliances will vary depending on the content being tackled, but there are some rules of thumb for making a balanced group. An individual party will tend to have something like 1 Healer, 1 Tank, 2 DDs, and 2 Supports. Since some jobs can work double-duty in roles, such as Corsair providing both support and DD, there's quite a lot of flexibility in this setup. An alliance will tend to have a DD party, a Tank/Healer party, and a Mage party. Each of these three parties will usually have a dedicated healer and support, providing buffs unique to that party (attack speed buffs for DDs, defense buffs for the tanks, etc). The mage party is usually there for crowd control, offering AOE damage or debuffing - most content that requires an alliance will pit you against large groups of enemies, and thus a party dedicated to handling these groups is necessary. Due to the large number of players, alliance composition is very flexible. | |
How to Evaluate Equipment and Build a Gearset
| Gear Evaluation Overview | |
|
Up until now, I suspect you've probably been treating equipment in FFXI like in any other MMO: you have one set of gear per job, and you upgrade it as you go along. However, FFXI is unique in that it allows you to change equipment even in the midst of battle, allowing for the game's unique "gearset" system. The Windower addon Gearswap makes swapping between equipment sets much easier and allows some functionality that vanilla FFXI doesn't (like precast sets for fast-casting spells). It can be quite complicated though, so I recommend this Gearswap guide on ffxiah.com for a crash-course. There's nothing wrong with using in-game Equipment Sets, of course, but Gearswap automates quite a lot and makes swaps both easier and faster. When it comes to evaluating whether or not a specific piece of equipment is good or bad for you, think about what set you would use the gear in and whether or not it will help that set achieve its goal. Take a look at a piece of equipment's stats and try to think if there's a set you can use it in, and if it's better than anything else you have in that slot. Sometimes your use for a piece of gear may be very obscure, such as only being used in a Dual Wielding mid-level accuracy set when at full haste (don't worry, I'll explain this later) - but if it's better than what you had before, it's still worth using! Now I'll explain the various sets you'll likely want, depending on your job's role. | |
| Heavy & Light DDs | |
|
DDs need to focus on two things: building TP and using Weapon Skills. You may also need distinct sets to ensure you have enough accuracy to hit or stay alive against tough opponents, but at endgame these often collapse into the two main sets.
Ranged Jobs
| |
| Tanks | |
|
Tanks have a lot of overlap with Melee DD sets, but with some tweaked priorities. I won't restate what's listed above, but will provide some more context where needed. Be careful when swapping out of your DT set when you start getting lots of HP there - swapping out to cast a quick spell may cause you to suddenly lose hundreds of HP! You should also always try to keep as much DT in your sets as possible, so you don't get tagged by a powerful hit when you're trying to gain Enmity or something.
| |
| Mages | |
|
Mages have very different gearset priorities compared to DDs and Tanks.
| |
Recommended Trusts
| Overview | |
|
There's quite a lot of Trusts in the game, and sometimes it can be difficult to know which ones you should prioritize over others. I would recommend you get as many trusts as you possibly can, as some quite powerful trust upgrades depend on you having over 80 trusts - so it's a good idea to collect 'em all. However, even with all the trusts in the world, it can be hard to decide which ones to summon, how to build a party of them, etc. That's what this section is meant to help you out with! Trust Party Composition Unfortunately, not all of these trusts will be available right off the bat. Some of them will only be available to acquire during certain Login Campaigns, others by completing Records of Eminence Objectives, others only after completing some (long) mission questlines. Treat these recommendations both as trusts to use that you might already have, and also as some goals to work toward in the future. Improving Your Trusts After reaching 99 and unlocking Job breaker you can speak to Syndella in Ru'Lude Gardens to obtain a Cipher bracelet. This will allow you to allocate points toward trust attributes and skill improving your trusts. For more information see Alter Ego Points. | |
| Easy To Get Trusts | |
|
As mentioned, many trusts aren't available outside of seasonal events or until completing very long mission chains. This section will give recommendations for trusts that you will either already have available, or are fairly easy to attain even for a fresh lv99 player. Damage Dealers
Tanks
Supports
Healers
| |
| Damage Dealer Trusts | |
|
Damage Dealer trusts will be very useful early on in the endgame, before you start getting decked out in powerful gear. Unfortunately, they tend to become less useful as time goes on and their damage begins to pale in comparison to yours. The most useful DD trusts are those that retain some other kind of utility - debuffing enemies, providing extra healing, setting up skillchains, dealing AOE damage, etc. That being said, if ever you're leveling up other jobs, DD trusts will be significant sources of damage and will speed up the process significantly. Always useful
Useful early on / while leveling
Useful for farming
Cannot be acquired until later, but good to know about
| |
| Tank Trusts | |
|
Tank Trusts are almost always helpful to bring along, though as you progress through the endgame you'll probably notice that you begin to steal enmity from them. Because of this, you'll sometimes need to purposefully hold back on your damage to ensure you don't die, or may wind up replacing the tank entirely. You may also consider bringing a subjob such as THF or DRG that will allow you to manipulate enmity more easily, to help keep it on the tank.
Cannot be acquired until later, but good to know about
| |
| Support Trusts | |
|
Support trusts are usually brought along to make YOU (and your other trusts too, I guess) more effective - usually by increasing your damage output. This is often through giving you haste, multi-attack, buffing your (physical or magic) attack/accuracy, giving you refresh so you have less downtime, etc. Support trusts are some of the most universally useful trusts available, as they more or less multiply your effectiveness - early on the boost support trusts give will be nice to make up for your lack of gear, and later on the boost will be worth more damage than even the strongest DD trusts. Generally, I recommend bringing along one RDM trust (for haste + debuffs), and then at least one non-RDM trust (COR, BRD, etc) - that way you'll ensure you have a variety of (de)buffs being applied.
| |
| Healer Trusts | |
|
You'll pretty much always want a healer trust to keep you and your party alive. Most healer trusts will get the job done of healing + debuff removal, though under the pressure of harder content the differences between them will become more apparent. I'll call out ones I think are notable, but most all healer trusts are worth using.
| |
Fresh 99 & Initial Gearing
| Initial Gearing - Sparks, Bayld, and the AH | |
|
Your first goal upon reaching level 99 is to reach "i119" - referring to "item level 119." While 99 is the max level, "item levels" will increase your strength FAR beyond a fresh lv99. Notably, the strength of your trusts is determined by your average item level, so raising this will vastly increase your soloing power. Depending on what content you've done, you may have some Bayld from Adoulin in your pocket - you can check your amount by going to Status > Currencies 2 in the main menu. I recommend buying five pieces of i119 equipment from Vesca, found in Eastern Adoulin at (F-7) in the Peacekeepers' Coalition, and an i119 "Homestead" weapon from Craggy Bluff in the same building for a grand total of 12,100 bayld. This gear isn't amazing, but the sheer base stats on item level 119 items, along with the trust item level strength increase, will make you noticeably stronger. If you don't have any Bayld, you can earn some quickly by exchanging Copper Vouchers (1,000 per Voucher), but it may be a better idea to complete some Coalition Assignments, detailed below. All jobs can get to 119 through bayld, but depending on your job you may want some extra gear to fill in some other sets - for example, the RDM bayld gear isn't good for TPing. If this is the case for you, feel free to fill in any holes with i117 Armor from Sparks vendors. This armor is only i117, but this will do for now. Stepping Stone Gear Always remember, you have sixteen item slots, each as important as the last. Rarely is any one piece of equipment hugely impactful on its own. BIS gear will often cost TONS of money - from 10m gil all the way up to 100m+. You will be better served by buying ten pieces of gear for 1m each than you will be buying one piece of gear for 10m. Don't focus on finding the BEST gear - focus on finding gear that's better than what you have. You won't go from hitting 3k Weapon skills to 30k ones in a single gear upgrade - you do so by upgrading ALL of your gear, bit by bit. Cheaper options will usually get you most of the way to a BIS option, for only a fraction of the cost. Upgrading Gear The Auction House | |
| Coalition Assignments | |
|
While working through your first leveling grind, be sure you're doing your Coalition Assignments. If you're at all interested in playing as RUN or GEO, you'll want to eventually reach max rank in every Coalition. This will take 7-8 months of IRL time, minimum - it's literally impossible to complete faster than this, so you want to get started early. Don't worry, you can complete some Coalition assignments very easily, even before level 99! Here are two coalitions that are particularly easy: Inventors' Coalition Couriers' Coalition | |
| Mog Garden | |
|
It's also recommended you begin taking care of your Mog Garden early. Just pop in and gather from everything every day. You can sell everything you find to the Green Thumb Moogle - almost none of it is worth AH'ing unless it's found on the beach. | |
Intermediate Records of Eminence Objectives
| Intermediate RoE Overview | |
These RoE objectives become available once you reach level 99, and will walk you through an introduction of many endgame-relevant content. It will also get you started with some good i119 gear, and unlock several endgame-relevant areas for you. It skips ahead of this guide a bit, so feel free to either continue following along with this, or use this as a reference for further explanation of how the various events work in more detail. Unfortunately, these objectives can be quite involved - too involved for me to go into detail in this guide. Fortunately, there's already a guide just for that thing! The Fresh 99/RoE Intermediate Quest/119 Gear Guide will walk you through these objectives in thorough detail. | |
| Reives | |
Reives are spur-of-the-moment events that occur in Adoulin areas. You'll require various Key Items (KIs) to participate in many of them - the Intermediate RoE objectives Guide above will walk you through getting those. | |
How to Earn Gil as a New Player
| Overview | |
|
Money makes the world go round, and unfortunately FFXI is no different. Making gil as a new player can be difficult, but there are ways to line your pockets even as a fresh new lv99 player. Generally when it comes to making gil in FFXI, the key is consistency. There aren't many get rich quick schemes that are consistent or reliable. Instead you tend to earn money by consistently earning smaller amounts that add up day by day. | |
| Gobbie Mystery Box | |
|
The easiest way to get gil, requiring no effort but quite a lot of luck, is to open up the Gobbie Mystery Box, as long as your character is at least 45 days old. Selecting to spin the Special Dial for 50 Tally (you automatically earn 10 Tally every day) will award you with a random item, selected from almost any item in the game. This means you can get a lot of junk, but you can also surprisingly often get equipment or crafting materials worth quite a lot of gil on the AH. You can get 50 Tally points once per day by trading the Goblin a Coffer Key, which are buyable from Curio Vendor Moogles for 5,000 gil each. This lets you spin the special dial once a day for 5000 gil a day, which (in the long run) will end up making a profit. | |
| Sparks of Eminence & Acheron Shields | |
|
One of the easiest ways of making money is by using Sparks of Eminence to buy Acheron Shields. They can be obtained by speaking to a Sparks NPC and selecting Equipment (Lv.71 - 98) and then scrolling to the third page. The shields cost 2,755 sparks each, and can sell for up to 28k gil (depending on your Fame in the nation you sell them in). You can spend a maximum of 100,000 sparks each week, resetting on Sundays - this will earn you in total roughly 1,000,000 gil for basically no effort! I recommend waiting until near the end of the week (either Friday or Saturday) before doing this, just in case you need to spend Sparks of Eminence on other items. | |
| Unity Accolades & Prize Powders | |
|
Similarly easy to Sparks & Shields is using Unity Accolades to purchase Prize Powders, which cost 10 accolades each, sell for 100 gil, and stack up to 99. Just like with Sparks, you're limited to spending only 100,000 Unity Accolades each week, but that's another 1,000,000 gil per week. | |
| AMAN Trove | |
|
The AMAN Trove is a special battlefield you can access once you hit level 99 and have a character that's at least 45 days old. Speak with Greyson near the exit in Lower Jeuno (G-11) to get started. There are Records of Eminence objectives you can set each month for AMAN Trove, under Content > A.M.A.N. Trove, to earn Silver Vouchers. Some of these you won't be able to clear yet, but many of them you can. You trade these vouchers to Greyson, and can then exchange them for Mars Orbs or Venus Orbs, which can be traded to the Burning Circles in Horlais Peak, Waughroon Shrine, or Balga's Dais to enter the battlefield. The battlefield for AMAN Trove is essentially a push-your-luck minigame, where you open up chests to get more and more rewards - but if you open up a Mimic, you will almost certainly be killed and lose all the treasure you accumulated. There are ten brown chests and one gold chest in the center. Opening the brown chests will either result in some amount of rewards, or a Mimic. When you're satisfied with the amount of rewards you've received, open the gold chest to end the battlefield and actually get your rewards. Note that when you open a brown chest, you will not see what specific rewards are received - just a hint about what kind they are. When opening a brown chest you will either hear a noise (lowest rewards), a thud (moderate rewards), or a loud thud (best rewards). Mimics are almost always a run ender - they technically can be beaten, but it's very difficult to do so, even for a very well-geared player. It's up to you how many brown chests you want to open before going for the gold chest to lock in your rewards. I tend to go until I get either a thud or a loud thud, but feel free to be more risky or conservative than that. Venus Orbs provide better rewards in general than Mars Orbs, but cost more Silver Vouchers to purchase from Greyson. There's a large variety of possible rewards from AMAN Trove, including very rare lategame drops and AMAN-Trove-specific drops that sell for absurd amounts of money. Note that if you don't trust your luck with AMAN Trove, you can always /yell in town offering to sell your orb. While you can't sell the orb itself (it's rare/ex), you CAN bring someone else into the battlefield with you, then Warp out so they get all the rewards. | |
| Crystal Clusters | |
|
As you play, you'll notice you start amassing quite a lot of crystals. If you trade your crystals to an Ephemeral Moogle (found in any crafting guild or your Mog Garden), they will store them for you. | |
| Enemy Drops | |
|
Enemy drops are, unfortunately, rarely worth selling on the Auction House. However, many of them sell for decent(ish) gil to NPCs. You're almost never going to sell something for more than a few thousand gil, but you get a lot of random trash and it adds up over time. Especially early on, when your inventory isn't completely filled with other things yet, each trip to a vendor can nets you 50k-100k that you could have just thrown away. | |
Domain Invasion
| Domain Invasion Overview | |
Domain Invasion (DI) is the first major endgame event you can take part in, and the rewards will remain relevant throughout your entire endgame career. You can participate in DI in Escha - Zi'Tah, Escha - Ru'Aun, or Reisenjima, so you can begin as soon as you're level 99 and have Escha - Zi'Tah access, which I'm sure you already do. You enter DI by speaking to the NPC at the start of the zone, and selecting "Receive Elvorseal" - then accepting when they offer to teleport you to the combat area. After a 3~10 minute intro period for players to join, a wave of enemies will spawn. After these enemies are defeated, a boss dragon will spawn. Once the dragon is killed the DI is a success and all players that participated will be awarded Domain Points, which can be spent with the NPC Zurim in Norg. Note that you can only get a limited number of Domain Points per day. - usually one or two DI runs will cap you on these. DI also rewards a currency called Escha Beads, but you don't really need to worry about these yet. The amount of DI you earn, and the daily cap, varies depending on how many times the DI boss has been killed - for more detailed information, please see the Domain Invasion page. The game will let you know if you cannot receive any more DI points for the day. You don't need to worry about contributing much to the boss fight itself - there will likely be many players around to help kill it, and anyone can attack it regardless of whether or not they're in a party. If you happen to die, don't warp to your Home Point! You can still get Domain Points for participating even if you're dead when the boss is defeated. Note that you can freely summon trusts during the fights, even while engaged with an enemy or boss, so if your healer dies just resummon another one.
DI is only active in one zone at a time, so you may need to hunt it down if the entrance NPC doesn't have the "Receive Elvorseal" option. The order is Zi'Tah -> Ru'Aun -> Reisenjima -> Zi'Tah. By far the easiest way to tell where it's at is to look at the website https://whereisdi.com/ - otherwise, if you're in Unity Chat your Unity leader will let you know where DI is as it moves around. | |
| DI Rewards | ||||||||||||||||||
|
You can spend your DI Points at Zurim in Norg (I-7). Rewards are divided up into different categories, based on how many DI points items within that category cost.
Nolan & Oseem Augments Nolan <Type:A/Rank:14[20]/NextRP:720> Type:A is what path has been chosen (in this example, Path A.) Nolan can also augment gear made with abjurations from the 400 point category of DI rewards, but we'll talk about those later. Oseem
While the augments ARE random, you can slightly influence them via stone choice. Pellucid stones tend to give Attack and Accuracy augments, including Magic Attack/Acc and Pet Att/Acc. Fern Stones tend to result in "Job Ability" augments such as Double Attack, Damage Taken-%, Fast Cast, etc. Taupe Stones tend to result in more base stats, such as STR, DEX, INT, etc. You can also trade Oseem Dark Matter to use for augmenting instead of a stone. These can result in ANY kind of stat occurring, including ones that normally can't with the other stones such as Treasure Hunter or Refresh. However, these are extraordinarily expensive, and good augments with them are rare, so I wouldn't recommend doing so unless you have more gil than you know what to do with. (Note that monthly campaigns can include a "Dark Matter Campaign" that lets you augment pieces of gear with Dark Matter augments for free 6-12 times a day. This is a good time to hunt for specific augments once you know exactly what you want.) Recommended Augments
| ||||||||||||||||||


Ambuscade - Very Easy Difficulty
| Ambuscade Overview | |
Ambuscade is likely where you'll get decked out in your first really good i119 gear! Ambuscade is an event that rotates every month, changing up what enemies and rewards are available. While this does keep things fresh and interesting, this also has a side effect where some months are easier for certain jobs than others. However, most months can be solo'd on Very Easy difficulty, even in i117 gear! There are two different fights available each IRL month, called Volume One and Volume Two. Volume One (V1) is also called "Intense Ambuscade" while Volume Two (V2) is "Regular Ambuscade" - as the names imply, V1 is higher level, but provides more rewards. Lower difficulty V1 is not always harder than higher difficulty V2! It is always higher level, but the two fights have different mechanics and gimmicks to them. For example, a V2 fight may spam Silence, and thus as a mage that may be nearly impossible to reasonably solo. This means that depending on the month and your job, you may actually have an easier time soloing an "Intense" Ambuscade (V1) compared to the "Regular" Ambuscade (V2). V1 fights are always themed around fighting some kind of beastman (Orcs, Antica, Tonberries, etc.), and V2 fights are themed around fighting non-beastman enemies (Spiders, Treants, Birds, etc.) To participate in Ambuscade, first start the Stepping Into an Ambuscade RoE quest and talk to Gorpa-Masorpa in Mhaura (G-9). This will net you a free Key Item for entering into V2. After this, you'll be able to set more RoE objectives to earn more Ambuscade entry Key Items. These can be found under Content -> Content (Ambuscade). The entry items for V1 and V2 are Ambuscade Primer Volume One and Ambuscade Primer Volume Two. Each Ambuscade has five difficulty levels - Very Easy, Easy, Normal, Difficult, and Very Difficult. Assuming the month's ambuscade doesn't have any annoying gimmicks, you should easily be able to solo Ambuscade Volume 2 on Very Easy difficulty, known as V2VE. Mercifully, the entry KIs are only lost when you successfully complete an ambuscade! This means there's no punishment if you fail an ambuscade, no exp loss either. Because of this, I highly encourage you to take on a harder difficulty than you think you're ready for! I would recommend trying out either V1VE or V2N - they both give the same rewards, and are against the same level of enemies. If that's too hard, try downgrading to V2E, and then again to V2VE. | |
| Ambuscade Rewards | |
|
Upon winning an Ambuscade, you'll be rewarded with a currency called Hallmarks - if you're in a group with other players, you'll also receive a currency called Gallantry. You can talk to Gorpa-Masorpa to spend these on various rewards. Most relevant to you right now are various armor sets, weapons, and capes. Note that you don't actually buy the armor, weapons, or capes directly - instead, you buy a voucher, and exchange that for the equipment desired by trading it to Gorpa-Masorpa. You can also obtain an item called Abdhaljs Seal that, when used, will TRIPLE the Hallmark and Gallantry rewards for the next Ambuscade that you win - losing or dying won't make the effect go away! Items Available for Total Hallmarks Note: Many of the rewards here sell for a LOT of money on the AH (such as Riftcinder and Alexandrite) but farming enough Hallmarks / Gallantry to afford lots of them while spamming VE will take a LONG time. I recommend instead spending your Hallmarks / Gallantry on upgrading your equipment directly, and then later on when you can reliably complete harder difficulties such as Normal or Difficult, come back to earn them much more quickly. Ambuscade Capes
| |
| Your First Ambuscades | |
|
So, there's a lot of stuff you can buy. What should you buy first, and what's the best way to get it? Follow these simple steps!
At this point, you can keep farming solo ambuscades for more cape upgrade items (not a bad idea) but it'll be much slower going without Seals. Feel free to start joining groups (you're well enough geared to meaningfully contribute to any groups doing V1VE or V1E) but otherwise it might be better to continue on to other content until you're strong enough to handle harder difficulties. | |
Main Storylines
| Storylines Overviews | |
Once kitted out in some 119 gear, I would recommend starting up on some of the main storylines. These vary wildly in length (and quality) but are overall worth it. Many provide useful rewards, and all of them give permanent bonuses to Capacity Points earned via Records of Eminence. Unlike many other MMOs, you DO NOT need to complete every storyline in the order it was released. Some storylines are pre-requisites for others, but in general you can often complete them in any order. I wouldn't necessarily recommend rushing to complete ALL of the stories ASAP, though - many will take a long time, and this is a good way to burn yourself out. Instead, work on them as you work on other content. Note that there are generally two major approaches to completing storylines - focusing on the narrative, or focusing on the gameplay / rewards. General consensus is that many of the stories are quite good, with some people saying many of the expansions are up there with single-player FF games in terms of characters and plot. However, many of the stories contain very strong gameplay rewards as well, so if you don't care much about the plot and just want to get the goodies, then following the most narratively-satisfying order won't help you much. Thus, I have split this into two sections - one recommended order for Narrative purposes, and another for Rewards. Feel free to follow one or the other, or consult both and figure out what order you personally want to use. | |
| Narrative Focus | |
|
This is my personal recommendation for what order to complete the stories in for them to be most narratively satisfying, and to make the most sense and flow the best from one to the other. You've probably already completed a good chunk of some of these, but I'll still list them in order just for the sake of clarity. A note about Rhapsodies of Vana'diel - You've almost certainly started the RoV missions by now. They contain a TON of extremely valuable gameplay rewards and benefits, and the story kind of follows alongside many of the others, but trying to do it in tandem with the others probably isn't the best way to experience the story from a narrative standpoint. RoV will introduce some characters / concepts way earlier than they normal, which can be not only confusing, but also lessen their impacts in the main story. While the below order is what I believe will give you the best story experience, some of the RoV rewards can be so good it may be worth considering doing some RoV missions alongside other storylines to get some of those benefits. Additionally, there are some points in these stories that will lock out progression past a certain point in RoV - wiki pages for the missions will warn you of these times, but keep aware of them so you don't accidentally lock yourself out for a while.
There are a handful of other storylines you can complete as well: Abyssea, Voidwatch, A Crystalline Prophecy, A Shantotto Ascension, and A Moogle Kupo d'Etat. These stories are much shorter, vary in quality + complexity, and in relevance. You'll probably want to do Abyssea for gameplay reasons, but all the others you can safely ignore unless you're really dying for more plot at this point. | |
| Reward Focus | ||||||||||||
|
This is my recommended order to complete things in to get the best rewards as soon as possible. You may wish to tweak this order slightly depending on your job and what rewards are relevant to you, but this is a good starting point and won't leave any job too far behind.
| ||||||||||||
Weapon Skill Quests
| Overview | |
There are many Weapon Skills that are locked behind quests that the game never really tells you about. Some of these can be VERY strong, and are fairly easy to solo with minimal gear. It's worth noting that not ALL weapon skills are worth questing for, so it may be worth doing some research for your job to see what is and isn't worthwhile. More options is never a bad thing though, so when in doubt, may as well unlock them. | |
| WSNM Weapon Skills | |
|
The first WS Quest you're likely to encounter is the WSNM Weapon Skill Quest for your weapon type. There's a unique quest for each weapon type to be completed, though they're all very similar - to tell which quest you need, please check the WSNM page. You'll be given a "Weapon of Trials" for your weapon, and need to earn 300 "Weapon Skill Points" with it by performing weapon skills and skillchains while having the weapon equipped. A standalone WS will earn you 1 point, closing a Lv1 Skillchain will earn 2 points, closing a Lv2 SC will earn you 3 points, and closing a Lv3 SC will earn you 5 points. The easiest way to accomplish this is to summon the Ayame Trust, who will open skillchains for you to close when you have 1k+ TP. This can make for easy Light and Darkness skillchains, if your weapon + job combo allows you to close them. Unfortunately, there's no obvious tracking for how many points you've earned. Instead, your Weapon of Trials will have a latent effect on it that will provide HP+20 and then +10 each into two elements. When you've finally earned 300 points, this latent effect will go away - when this happens, return to the NPC that gave you the quest and trade the weapon to them. You will then need to go kill an NM unique to your quest. Once you kill the NM, make sure you check the ??? point that spawned it to receive a Key Item (KI), and then return to the quest giver to complete the quest and unlock the Weapon Skill. | |
| Merit Point Weapon Skills | |
|
You've likely noticed by now that there's a Merit Point category for Weapon Skills. You've also probably noticed that you can't actually unlock any of them - that's because you first need to complete the quest Martial Mastery. This is very easy - simply bank up 15 merit points and turn them in to the Nomad Moogle next to Maat in Ru'Lude Gardens. You'll then be able to start putting merit points towards unlocking Weapon Skills. How many points to put towards a weapon skill will vary depending on your job and how useful the WS is for it, so you'll need to do a bit of research on your own for your job. | |
| Empyrean Weapon Skills | |
|
Empyrean Weapon Skills, named after the Empyrean Ultimate Weapons, are unlocked via the Kupofried's Weapon Skill Moogle Magic series of quests - there's one for each weapon type. However, in order to unlock those quests, you'll first need to complete the quest Guardian of the Void, and then upgrade a Magian Trial weapon via Walk of Echoes. Magian Trial weapons are upgraded in stages from a base form, in this case using materials from a zone called Walk of Echoes. Guardian of the Void meanwhile is a Voidwatch (VW) quest. VW is a bit too complicated to fully go into here, but I'll touch on what you need to know. Upgrading your Magian Trial Weapon and working on Guardian of the Void can be done in any order, and can be worked on in tandem. I recommend switching between the two if you start feeling burnt out on one - they can both be a bit time consuming. Voidwatch Magian Trials & Walk of Echoes
All of these can be earned from Walk of Echoes Battlefields. Walk of Echoes (WoE) can be entered via the Veridical Conflux in Xarcabard (S) (H-9) - right next to the only Home Point in the zone. When you enter, you'll find 13 different confluxes leading to different "walks". Each walk has its own victory conditions, and the higher the number generally the more difficult the zone. These can mostly be soloed, but some of the later ones may be more difficult depending on your job. Note that sometimes a zone will become "surged" and thus have much harder enemies in it. Each walk can drop any of the items listed above that you'll need, but note that Devious Dice and Liminal Residues tend to come from higher-tier walks. I'd recommend trying all the walks and seeing which ones are easiest for you, different jobs can have a harder/easier time with some walks than others. Note that all players can attack all mobs in the walks, so if there are other players farming walks I'd encourage you to follow along with them - it'll make clearing the walks that much faster and easier! Note that if you start getting tired of farming WoE, you can instead buy the coins / dice / residue you need from player bazaars. They can't be auctioned, but you CAN look up the items on https://www.ffxiah.com/ to see which players are offering them in bazaars, and what their prices are listed as. Once you've fully upgraded your magian trial weapon and have completed Guardian of the Void, equip the weapon and head into Walk of Echoes. There you'll find a ??? point near some stairs, which will trigger the start of the corresponding quest. Simply select the corresponding weapon type, and then trade your weapon to the ??? to complete the quest and unlock the weapon skill. | |
| Mythic Weapon Skills | |
|
Mythic Weapon Skills, named after the Mythic Ultimate Weapons, are unlocked via the Unlocking a Myth quest. There is a unique Mythic Weapon Skill for every single job in the game, rather than being tied to weapon types. To begin the quest, you'll first need a Vigil Weapon for your associated job, which can be found from the Nyzul Isle Investigation Assault mission. You may not have done any Assault missions yet, so to get started you'll need to first speak to Rytaal in Aht Urghan Whitegate (K-10). Once he walks you through Assaults and gives you the entry Key Item (KI) needed, head over and talk to Sorrowful Sage nearby to select Nyzul Isle Investigation. Then, head to the Chamber of Passage to warp out to Nyzul Isle. Nyzul Isle Investigation is a mission where you have 30 minutes to go up as many floors as you can, with each floor being randomly generated. Every 20 floors you'll encounter a boss. The combat encounters are trivially easy for any lv 99 player, but some of the puzzle floors may prove annoying to do solo. One of the ultimate weapons in the game requires a lot of Nyzul Isle progress to complete, so it's fairly easy to find players willing to help you out if you /yell for some assistance. All NMs in Nyzul Isle will drop Vigil Weapons, so eventually you'll wind up finding one for your job. The floor 100 boss is guaranteed to drop your job's weapon if you're the leader of the assault. Once you have your Vigil Weapon, equip it and talk to Zalsuhm in Lower Jeuno (H-9) to begin the quest. Just like with WSNM Weapon Skills, you'll need to earn 250 "Weapon Skill Points" with it by performing weapon skills and skillchains while having the weapon equipped. A standalone WS will earn you 1 point, closing a Lv1 Skillchain will earn 2 points, closing a Lv2 SC will earn you 3 points, and closing a Lv3 SC will earn you 5 points. The easiest way to accomplish this is to summon the Ayame Trust, who will open skillchains for you to close when you have 1k+ TP. This can make for easy Light and Darkness skillchains, if your weapon + job combo allows you to close them. You can tell when you've earned enough points because you'll see that the Mythic Weapon Skill you're working towards is available to you while you have the Vigil Weapon equipped! Trade your finished weapon to Zalsuhm and you'll permanently unlock your job's Mythic Weapon Skill to use with any weapon. | |
Job Points & Capacity Points
| JP & CP Overview | |
Now that you're fully decked out in i119 gear, it's as good a time as any to start thinking about earning some Job Points. If you played back in the 75-era days, Capacity Point parties will feel very familiar - they're essentially the exp / merit parties of old. Capacity Points (CP) are similar to Experience Points, and you earn BOTH when you kill a mob that's a high enough level. You'll need 30k CP to earn 1 Job Point (JP). Most of the time groups will go to "Gates" areas - Doh Gates, Moh Gates, Sih Gates, etc. That's because these areas contain Apex Monsters, which provide abnormally large amounts of Capacity Points. While you may be able to solo Apex mobs with trusts depending on your job, JP will go MUCH faster with a group. Keep your eyes open on the /yell chat for groups forming that may want the role you provide, or try making a party yourself! If you follow the 2xDD, 2xSupport, 1 healer, 1 tank rule outlined in the Party Composition section above, you should be just fine. If you just want to solo some JP to kill some time, early on an easy target are the frogs and pugils in Marjami Ravine. If you head to Frontier Station #2, you'll find yourself at the perfect camp to farm them. Marjami Ravine in general has mobs that are fairly good for farming Capacity Points, as few of them have any particularly annoying TP moves. Once you have some better equipment, I recommend hunting Apex Efts in Moh Gates (J-8)/(K-8) for solo JP. The fastest way there is via the Morimar Basalt Fields Frontier Station waypoint. They don't link or aggro, and there's so many of them that even when the camps are heavily crowded, it's easy enough for a lone person with trusts to make decent experience. There are also Apex Eruca nearby that are decent targets as well, but note that they aggro (but don't link). The nearby Apex Raptors can be good too, but are more difficult - they also aggro without linking. Note that you'll need Sneak to reach these camps, so bring along Silent Oils if you don't have that naturally. | |
Level 119 UNMs
| UNM Overview | |
Unity Wanted Notorious Monsters, known as UNMs, are monsters that are spawned using Unity Accolades at Ethereal Junctions around the world. To fight a UNM, you'll need to set a Record of Eminence objective for the specific boss you're looking to fight, found under Unity -> Unity (Wanted 1). The objective will also tell you what zone the boss is in, and what POS locations it can be spawned from. An easier way, though would be to talk to A Unity NPC and request to be teleported to a location - this will usually teleport you very close to one of the Ethereal Junctions used to spawn the UNM. There are many UNMs at a wide range of levels, but you'll probably have difficulty handling level 122+ UNMs at this point. Many UNMs have some kind of light gimmick to them, but for the most part they're straightforward and should be relatively easy to solo for you at this point, though some jobs may struggle more than others. Be sure to summon Trusts before you spawn the UNM, as it will spawn aggroing you. When you spawn the boss you and your party will be granted full HP+MP, so don't worry about resting in between fights. You even keep buffs + TP, so be sure to buff yourself up before spawning the boss. | |
| UNM Rewards | |
|
After beating a UNM, you will receive a coffer unique to that UNM in your inventory. Using that coffer item will give you a random reward - either a piece of equipment, a drop item unique to that UNM used to upgrade that equipment, or one of many other possible drops (gil, crafting material, etc). I would recommend looking through the list of UNMs to see which ones drop equipment relevant to your job - I've pointed out some notable ones up above. Other drops to look out for are Plutons, Beitetsu, and Riftborn Boulders - these won't be useful to you yet, but they will be later on. They also sell for decent gil if you save up 99 of them. While UNMs can drop +1 versions of equipment, most likely you'll have an easier time getting the regular version, and then upgrading it to +1 manually. This is done by collecting 50 of that UNM's unique drop - such as Imperator's Wings from Valkurm Imperator. Once you have 50, trade them along with the equipment to a Unity NPC, and (as long as you can afford the 10k Unity Accolade fee) then the next in-game day the +1 gear will be yours! | |
Yorcia Weald Alluvion Skirmish
| A. Skirmish Overview | |
Alluvion Skirmish is where you'll start decking yourself out with some good weapons and patch up some holes in gear from your Ambuscade set. Not to be confused with regular Skirmish, which doesn't reward anything worth keeping anymore. Alluvion Skirmish can be done in Rala Waterways, Cirdas Caverns, and Yorcia Weald - however, you generally will only want to participate in the Yorcia Weald A. Skirmish nowadays, as the other areas have outdated rewards. Before you can enter A. Skirmish, you need to talk to Lola and Oston in Eastern Adoulin, near the large goddess statue. You'll likely need to talk to them each multiple times. In order to enter A. Skirmish, you'll need four items: three Simulacrum Segments and a Eudaemon item. All of these can be purchased from the Auction House, or you may have some from Reives.
| |
| Clearing Alluvion Skirmish | |
|
The A. Skirmishes in Rala Waterways and Cirdas Caverns work differently than in Yorcia Weald, so we'll ignore those and just focus on how it works in Yorcia. This can be quite confusing, so if reading this seems overwhelming, I also recommend watching Cloudchief's video guide on Yorcia's Alluvion Skirmish. You enter by trading the three Simulacrum segments together with the Eudeamon Sash to Oston in Eastern Adoulin, then using a Waypoint to travel to the Augural Conveyor in Yorcia Weald. Examine it to enter the A. Skirmish. There is a timer in A. Smkirmish, the length of which is determined by the torso you traded. However, it begins running down as soon as you enter, so you'll want to summon your trusts and buff yourself right away and then go examine the Living Cairn to enter A. Skirmish proper (you start in a safe area). In Yorcia's A. Skirmish, you must protect a Marchland. Enemies will advance toward it in waves, and if it's destroyed (or you run out of time) then you fail. Don't worry though, because you can summon friendly monsters to advance towards the enemy base, known as a Stronghold - if you defeat this, you'll be able to advance to the next floor. There's a UI component beneath the timer in the upper-left of the screen, showing the health of your Marchland, the enemy Stronghold, and how many monsters you each have alive. To spawn monsters, use the Ars Monstrum book, which can be found near where you begin. However, you need to spend a currency called Puissance to spawn them. You start with 1000 Puissance for free. Select the option Call Forth a Valiant - monsters that are friendly to you are called "Valiants". Since you used a Eudaemon Sash to created the A. Skirmish, you'll be able to select "A Shijin" at the bottom of the list for a full 1k Puissance. This will summon a Valiant Kirin, which is the strongest enemy available. On the first floor of the skirmish, Kirin will basically be able to solo everything. I do not recommend attempting to attack the enemy units that advance toward the Marchland!! These monsters are going to be way too powerful for you to handle at this point, which is why we'll let Kirin do the dirty work. They will NOT aggro you, though they CAN aggro your trusts. If one of your trusts gets aggro, you can dismiss them or let them die, then just resummon them. While Kirin starts killing stuff, feel free to explore around and kill off other enemies that are in the area, called Escalents - the Twitherym type enemies are easiest. You may be able to find rare NMs that are either a slime or a Fomor - killing them may be a bit challenging, but will grant extra rewards and are generally worth hunting down. When the enemy Stronghold has reached half health, the game will tell you what rewards you'll receive upon completion of the skirmish. Valiant monsters cannot defeat the Stronghold - you'll need to deal the final blow. Any amount of damage will do, so you can throw a Dia or something on it if you want. If you need more Puissance to summon more Valiants, there's two ways to get some. First, you can use the option Convert to Puissance in the Ars Monstrum to generate more at the cost of a resource called Obsidian Fragments (easily obtained from exchanging Copper Vouchers.) Second, whenever you kill Escalents, you'll get small amounts of Puissance. Once the Stronghold is defeated, a chest will spawn, as will another Cairn. If you open the chest, then THE EVENT WILL END. Only open it if you're ready to leave! If you want to move on to another floor, then examine the Cairn and continue on. The next floor will be more difficult, and you'll likely need to summon more monsters than just Kirin. The second floor is fairly easy even then, just be sure you keep mental track of where the Marchland is (it'll always show up on Wide Scan) and summon more Valiants if needed - keep a close eye on your monster list and Marchland health. If you don't think you're ready for the next floor, leave after completing this one - there's nothing wrong with leaving early! | |
| Alluvion Skirmish Rewards | |
|
You're guaranteed to get one piece of gear per floor. The notable armor sets are the Yorium Armor Set and Acro Armor Set for heavy DPS, the Taeon Armor Set for light DPS, and the Telchine Armor Set and Helios Armor Set for mages. There are also a variety of Alluvion Skirmish Weapons for all jobs. All of the Alluvion Skirmish equipment is very strong at this point, because they each can be augmented to be much more powerful. The other reward you want to keep an eye open for is Mellidopt Wings - you can trade multiple of them to Lorissa at Yorcia Weald (I-10) in return for the above armor and weapons. The amount of wings required varies depending on the piece, between 1 to 3 wings per item. You may also receive various stones from A. Skirmish, with names such as "Dusktip Stone" or "Snowslit Stone". These stones are used for augmenting A. Skirmish gear - definitely hold onto any +2 stones you find, and if you're low on cash also consider holding onto +1 versions. Any normal-quality (NQ) stones you find you can probably either try to sell or just throw away. Alluvion Skirmish Augments To actually augment the gear, trade it along with a stone to Divainy-Gamainy in Western Adoulin (J-10), at the Inventor's Coalition. You'll need some Obsidian Fragments to augment the gear, which can easily be gained by trading in Copper Vouchers. I would recommend using only +2 or +1 stones for upgrading - the higher-quality the stone, the more likely the augment will be the maximum possible value. +2 stones can get expensive for the ones that provide better stats though, so a +1 stone can work, just be prepared for getting more subpar augments. Recommended Augments
| |
Reforged JSE Armor
| Reforged Armor Overview | |
There are three sets of Job Specific Equipment (JSE) that can be "Reforged" for every job - Artifact Armor (AF), Relic Armor, and Empyrean Armor. You likely already have your Artifact (AF) Armor, which is earned through a series of quests unique to each job. Relic Armor is obtained from Dynamis, and Empyrean Armor is earned in Abyssea areas. These sets are all below level 99, however they can be "reforged" into i109 versions, and then upgraded into +1 versions that are i119. AF and Relic can then be further upgraded to +2 and +3 versions, but we'll handle those later. The usefulness of reforged JSE varies wildly by piece and by job. Some pieces are pretty much worthless, while others can be gamechangers and BIS. I would recommend looking up a guide for your job, or at least looking over the reforged pieces to see if they're worth the effort - reforging can be time intensive, and sometimes quite expensive. Before we get into Reforging JSE, though, you'll need to get your base Relic and Empyrean armor sets. | |
| Relic Armor - Dynamis | |
Dynamis is an event that takes place in an alternate-reality Vana'diel - think the dark world from Link to the Past. You have a limited amount of time to spend in each zone, but can increase this time by killing statue NMs. Beastmen in these zones drop Relic Armor, most of which will provide extra effects to your job abilities or traits. There are two "groups" of dynamis zones - "Original" Dynamis, and "Dreamworld" Dynamis. You'll need to complete the final areas of both original and dreamworld dynamis to access some endgame areas. The enemies in these areas won't post much trouble to you at 99, however it is easy to get overwhelmed by many foes, so be careful and don't get cocky. If you die or otherwise leave Dynamis, you'll need to wait until the next day (in real life) before you can re-enter. However, the key item Original Dynamis Dreamworld Dynamis Dynamis Procs & Ancient Currency Proc'ing in Dynamis will primarily be used to get Ancient Currency - this isn't particularly useful to you yet, but stacks of 99 (or single 100-pieces) sell for a good bit of gil. Farming Dynamis for this currency can be quite profitable at this point in the game. I recommend watching This video guide by youtuber Cloudchief which will walk you through farming this currency in Dreamworld Dynamis zones. Relic Armor | |


| Empyrean Armor - Abyssea | |
As stated in the above Storylines section, Abyssea is an alternate reality of Vana'diel. Most of the gear is out-dated, but the Empyrean Armor that's found here is similar to the Relic Armor from Dynamis. There's a long series of Abyssea quests, which you can honestly do at your leisure. However, it is worth entering Abyssea now to get a full set of Empyrean Armor for your job. Important Abyssea NPCs
Abyssea Chests
Abyssea Light
Abyssea Procs
Empyrean Armor Empyrean Footwear | |
| Reforging Armor | |
|
Reforging your AF, Relic, and Empyrean armorsets are all done at the NPC Monisette in Port Jeuno (I-8). You need to trade her the original piece of AF/Relic/Emp gear, specific Rem's Tale chapters, and then a handful of other items depending on your class and the item you're reforging. The gear will first be reforged to i109 versions, and then can be upgraded in a similar way to i119 +1 versions. Later on you'll be able to upgrade AF and Relic pieces to +2 and +3, but that won't be for a while. Rem's Tales Reforging & Upgrading Empyrean Armor | |
Limbus
| Limbus | |
This and the following section might be premature, because they require Rhapsodies of Vana'diel completion, but both are long grinds with strong early rewards that are better to start early. Skip past this and Sortie if you're not there yet!
To start, get the To clear a Limbus zone, examine the teleporter and go to a floor. Then kill mobs on that floor until the bar in the top left of your screen fills up and you receive a "data" temporary item. Then go to another floor and repeat. Once you have the "data" temporary item for every floor, you can examine one of the Chests on the final floor of each of the four areas in the zone to receive your reward. (See for more information about why you should switch which chest you open every time.)
Alternatively, you can check whereisnm dot com to see if there are any ???s present. Examining these ???s gives you both Units (the currency used to reforge Relic and Artifact armor to +4) and temporary items that allow you to open the chest without collecting every floor's "data". | |
Sortie
| Sortie | |
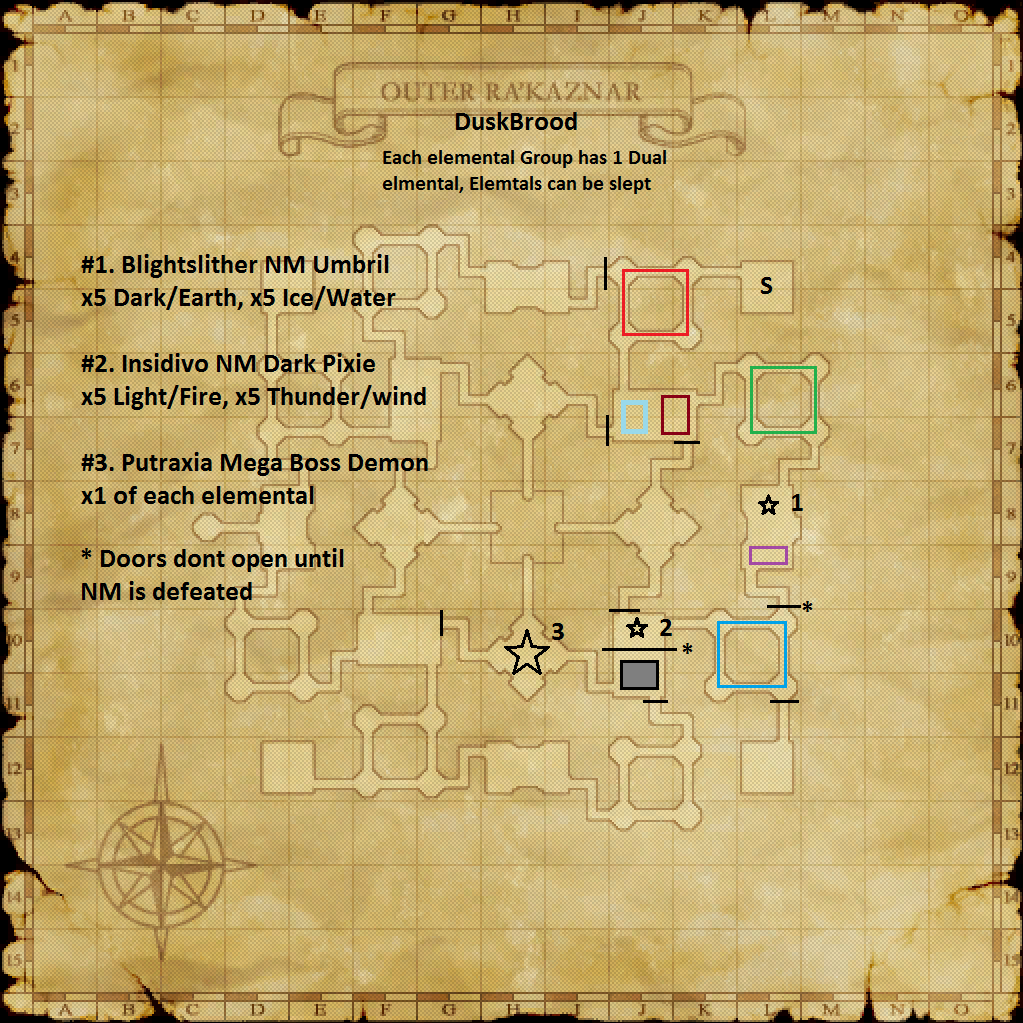
Again, this might be earlier than it should properly be in the ordering - if you have RoV clear at this point, great, start grinding it out! If not, be aware that Gallimaufry is very slow to earn solo and you will want a lot of it - specifically, 80,000 for each piece of Empyrean Armor you want to reforge to +3, and most jobs want all 5 of their pieces. Once you are able to enter Sortie, there's a lot of things you can't do. Many doors and teleporters require permanent
Your first goal should be doing an "unlocking" run, aiming to get Ra'Kaznar Keys A/B/C/D, Ra'Kaznar Plates A/B/C/D, and Ra'Kaznar Sheets A/B/C.
There are various guides available on the internet for this. Some are written, some are video. | |
Ambuscade - Normal Difficulty
| Recommended Upgrades | |
This is a good time to return to Ambuscade for some upgrades! You're likely ready at this point to tackle Vol 1 on Normal difficulty, although you won't be able to solo it. It's a good idea to join in with a group and tackle some V1N runs though, as it will net you FAR more Hallmarks compared to running solo - the Gallantry will be a nice bonus, as well. At this point, it's a good idea to upgrade your Ambuscade Armor to the +1 version, and maybe even the +2! You can get vouchers for a full set of +1 armor for free from the "Total Hallmarks" rewards category by earning a total of 14,500 Hallmarks over the course of the month. Soloing V1VE will only net you 200 hallmarks, so that will obviously take a LONG time. However, Normal runs will award 1200 each, which will only take you 12-13 runs to earn enough hallmarks - fewer still if you use Abdhaljs Seals! Normal runs with a group will likely go much faster than your solo V1VE attempts, anyways. You may also consider upgrading one or two pieces to +2 - this is done using 10 Abdhaljs Metals or Abdhaljs Fibers, depending on the armor set. You'll get up to 5 of each for free each month via Total Hallmark rewards, and can buy up to 15 more using Hallmarks/Gallantry. It's also a good idea to upgrade your Weapon to the "Kaja" version. This is done using Abdhaljs Nuggets, Abdhaljs Gems, and Abdhaljs Animas. You'll probably want to think about creating a second Ambuscade Cape too. That's right, you can make multiple of the same cape! It's a good idea to create different capes for different niches and roles. Mages will probably want ones for different types of spells, such as one for healing (MND, Cure Potency, Enmity-) and one for enfeebling / offensive casting (INT/MND, Magic Accuracy). Tanks will want capes for tanking (HP+, Enmity+, Damage Taken-%) and one for dealing damage (Store TP, Weapon Skill Damage, etc). Melee DPS Will want one for gaining TP (Acc/Att, Store TP, Double Attack, Dual Wield) and one for using Weapon Skills (STR, DEX, Weapon Skill Damage, etc). You can make up to 3 full capes per month. | |
Escha Ru'Aun Warders
| Overview | |
There are a number of NMs that can be spawned in Escha - Ru'Aun that can drop a lot of very useful gear. These are known as the "Nazar" NMs because they all drop "Nazar" Key Items, and are also called Warder NMs because each of them has "Warder" in the name. The Nazar KIs are used to spawn a very powerful endgame boss that you don't need to worry about just yet, but the NMs themselves have some very useful gear. Each major section / island of Escha Ru'Aun has a variety of enemies, and each type of enemy has a chance of spawning a Warder when killed. This is a fairly low chance, so it may take a while for the Warder to show up, but it'll make for some good Merit Points and Job Points while farming. | |
| List of NMs | |
You should be able to solo nearly all of these with trusts. Warder of Love will probably be the most difficult, but is also the one you're least likely to encounter. All these NMs have a chance of spawning when you kill specific enemies in Escha - Ru'Aun as long as you're NOT carrying a Mollifier - so don't buy one if you're hunting these. One thing you SHOULD buy are Rare Enemy Vorseals. These NMs have a very small base chance of spawning, and some of the drop rates aren't great, so you'll want as many of these as possible to help alleviate farming time. | |
| Notable Rewards | |
|
There's quite a lot of notable drops from these NMs, honestly too much to mention all at once. I'd recommend looking at each NM's page and seeing if anything they drop catches your eye. Some baseline guidance, though:
You may have noticed that each warder has a chance to drop a specific piece of Torque neck equipment. If you get all of the magic skill torques, they can be synthesized together to make the Incanter's Torque which is VERY strong for many mage jobs. The combat skill torques can also be combined to make the Combatant's Torque, which is good for some Weapon Skills but is generally more niche. The combat skill torques can be used for higher skills in some weapons to meet requirements for Abyssea Red Procs, particularly for Katana (Yarak Torque) and Great Katana (Agelast Torque). I'd recommend finding another player to help out with getting the synergy to create these, though, unless you want to be a synergist on your own. | |
NQ Abjuration Gear
| Abjurations Overview | |
"Abjurations" is a name commonly given to a series of armorsets that are obtained by trading a Cursed Item along with an Abjuration to the NPC Alphollon C Meriard in the North Sand d'Oria church. There are many armorsets that can be made this way, but the only ones still relevant are the Escha Ru'Aun abjuration armorsets. These abjurations are dropped from Escha Ru'Aun Geas Fete NMs (we'll cover those in more detail later) and unfortunately are likely too strong for you to easily solo right now. However, you can get them easily by spending 400 DI points on the appropriate Abjuration. I'd recommend getting some friends to kill the NMs instead, but if you can't (or don't want to tspend the time) then feel free to spend DI points instead. The cursed items are made via crafting, and thus you will most likely need to buy them from the Auction House - they can be quite expensive, unfortunately. I would recommend looking at the list of armorsets and pick out a few key pieces that seem beneficial to you. The HQ pieces are more powerful, but are quite a lot more expensive. Rather than spending 20m on one HQ abjuration piece, I recommend buying multiple NQ pieces instead - they'll add up to be much more benefiical. Also note that Abjuration pieces can be augmented! They're augmented with Nolan just like the 200-cost DI weapons, and it takes 3 Eschalixir +2s to fully augment them. What path you pick depends on the piece and the job you're using it on, so I'd recommend looking up a job guide for more assistance there. | |
Level 122 UNMs
| Lv. 122 UNMs Overview | |
Now that you're likely decked out in full +1 Ambuscade and a few NQ Abjuration / +2 Ambuscade pieces, you should be able to tackle the level 122 UNMs solo. Just like the 119 UNMs, they drop coffers which can give equipment, upgrade items, or other misc. drops. I've listed the notable drops for various jobs up above, but there are a decent number of job-specific drops that may catch your eye, so I'd recommend checking out the List of UNMs to see if there's anything more specific to your job. You might be able to solo some of the lv125 UNMs at this point, but it'll likely be very difficult. If you can grab a friend or two to join you, or do some /yell'ing in town, you can likely tackle them, though. | |
High Tier Mission Battlefields
| HTBF Overview | |
High Tier Mission Battlefields, abbreviated as HTMB or HTBFs, are ilvl versions of notable fights from Mission and Quest storylines. There is a frankly ridiculous amount of powerful equipment obtained from these, the list above leaves quite a lot out. You enter into HTMBs by speaking to one of three specific NPCs in the three main nations and then trading in Merit points for an entry KI. It typically costs 10-15 merit points to get a KI. Unfortunately, in order to access any given HTMB, you need to have completed the associated mission or questline - for example, if you want to participate in The Warrior's Path HTMB, you must already have completed the CoP mission The Warrior's Path. I would recommend looking through the list of Battlefields and seeing which rewards you want to aim for first, and then focus on completing missions / quests up to that point. Unlike Ambuscade, you lose the entry KI as soon as you enter a battlefield! Thus, I would recommend picking Very Easy difficulty for your first attempt at your battlefield of choice. You will very likely have few problems clearing VE with how well equipped you are now, however the drops rates for VE are generally very poor (the Lilith HTMB is the exception) so you should try to work up to Easy and then give Normal a shot. Once on Normal difficulty, the drop rates generally become fairly reasonable, so if you can't solo those yet (whether or not you can will depend heavily on the battle itself and your job) I would recommend /yell'ing for help or asking your LS, even getting 1-2 other people will make things much easier, and many people are looking for the valuable rewards from these fights. | |
RoE Trust Quests
| Overview | |
To get started, you'll first need to have unlocked the following Trusts: Naji, Ayame, Volker, Iron Eater, Excenmille, Curilla, Trion, Kupipi, Nanaa Mihgo, Ajido-Marujido, and finally Shantotto. You'll also need to have completed the CoP mission Dawn, and have access to Ru'Aun Gardens. Once you've unlocked all of those, go speak with Jamal in Ru'Lude Gardens (H-5) to get started on the quest, which will appear in your RoE logs under Other > Quests 3. Simply accept the RoE quest, then go kill the corresponding AA HTBF, then report back to Jamal to receive the cipher and unlock the next AA RoE quest. The fights themselves may prove too challenging to solo depending on your job, but you likely will be okay if you stick to Very Easy difficulty. The main thing to watch out for is that you don't pull hate away from your trust tank. All the AAs will try to skillchain, which can take you down very quickly. Additionally, the AA Mithra can Charm you, even if she has a pet out. The only other notable danger is AA Hume's ability to use Mijin Gakure, which WILL kill you. I recommend bringing along Reraiser and Hi-Reraiser items along just in case, and when he starts getting low (20-30%) back up to at least 20' away and wait for him to pop it on your trusts. Why do you want the Ark Angels? Almost all of their trusts are quite strong. AAGK is one of the best damage-dealing trusts for when you decide to level another job up to 99 - he will spam out self skillchains very quickly for tons of damage. AAEV is one of the best tank trusts in the game - she stays alive, keeps hate well, and will heal both you, herself, and party members. AAMR is another strong damage dealer for low levels. AATT is probably the weakest of the bunch, but has a unique property: he is the only trust that will cast AOE sleep, and he is very accurate with it too. This can make soloing groups of enemies much easier for jobs that lack debuffs or forms of crowd control. Finally, AAHM is another great tank, and will tnak via casting Utsusemi to avoid damage. Note that you will not be able to turn in the Ciphers for these trusts until you have completed the Rhapsodies of Vana'diel mission Exploring the Ruins. | |
| Capacity Quests | |
|
After completing all five of the AA Trust quests, you may be able to get started on the RoE Quests Filled to Capacity, Over Capacity, and Way Over Capacity by speaking with Marjory, who is near Jamal in Ru'Lude Gardens. However, in order to receive this quest, you must first have a total of 86 trusts unlocked, NOT counting Unity leaders. To accomplish this, you'll need to take full advantage of monthly login campaigns offering free trusts, and you'll need a fair number of ones from completing quests and storyline missions as well. Once you've amassed enough trusts, Marjory will give you the first quest, Filled to Capacity. To complete it, you'll need to amass 500,000 Capacity Points with at least one trust summoned in your party. Completing it will award you with Cipher: Ingrid II if you don't already have it. The second quest is identical - obtain 500,000 CP with a trust summoned, and you'll receive Cipher: Rosulatia if you don't already have it. Finally, the third quest will once again request you to earn 500,000 CP with a trust summoned, and will reward you with a Filled memory gem Key Item and Cipher: August if you don't already have it. August is arguably the strongest tank trust in the game, but the REAL draw here is the Filled memory gem. | |
Master Levels
| Overview | |
If you're Job Mastered, now would be a good time to consider earning some Master Levels. Master Levels (MLs) are very similar to regular job levels - you earn exp and when your bar is filled you'll Master Level Up, which provides a variety of benefits. Each Master Level will give you +1 to all base stats (STR, DEX, etc), +1 to all of your job's base combat and magic skills, +7 Max HP, and +2 Max MP. Additionally, for every 5 MLs you get, your support job's level cap will be raised by 1. Notable breakpoints are usually ML5 (subjob raised to 50) and ML30 (subjob raised to 55) - though some jobs specifically have other important breakpoints. Master Levels cap at 50, bringing your subjob up to level 59. Increasing your subjob level has an obvious benefit (access to additional Abilities, Traits, and Spells), but don't sleep on the stat increases either. Individually, each ML provides a fairly small benefit, but once you have a lot of them it will be VERY noticeable. 20 MLs is the equivalent of +20 attack/Mag att, +20 (mag)acc, +210 HP, +40 MP, and +20 to ALL base stats - these are incredibly large boosts, the equivalent of an entire extra main equipment slot. Go speak with the Nomad Moogle in Ru'Lude Gardens (H-5) to unlock Master Levels - your job will then appear as ML0 when you are examined. Once unlocked, any job that you master will automatically switch over to progressing on Master Levels. Once you're ML 0, you'll begin earning Exemplar Points instead of experience points. Just like with regular exp, Exemplar Points are earned when defeating enemies and are lost upon dying without a raise - and yes, you CAN Master Level Down. Exemplar Points are earned much more slowly than regular exp, and as of writing the ONLY way to increase the amount earned is via COR's Corsair's Roll. All enemies with Locus in the name will award additional Exemplar Points, and most parties choose to farm these accordingly. Just like with CP, you can solo farm these with trusts on most jobs, but it will go much faster with a group, and parties recruit via /yell chat somewhat frequently on most populated servers. Be warned that Master Levels can take a LONG time to earn, especially from ML30+ the amount of exemplar points required is quite high. I recommend Getting started on earning MLs as soon as you can because of this. I would recommend getting to ML5-10 around now, it'll be a nice boost in stats and won't take a horribly long time, especially with a party. Then when you have some free time or don't feel like focusing on other content, try to farm up some MLs. More are better, but once you're at around ML30 you should be plenty strong enough to handle most content the game has to offer, and anything above that is mostly icing on the cake (or for the hardest content available). | |
Odyssey - Sheol A
| Odyssey Overview & Rewards | |
Odyssey is relatively new content to the endgame. Odyssey is divided into three difficulties, known as Sheols - A, B, and C. Finally, there's Sheol Gaol which is a mini boss rush. Sheols A/B/C are small, instanced dungeons containing multiple floors containing big groups of enemies and some spooky near-invisible beastmen. As enemies are killed, players will earn a special currency called Izzat, which is lost upon exiting the run. Izzat can be used to open chests (which can also be picked by THFs) to get additional rewards, and can be used to spawn NMs throughout the Sheol. At this point, you should be able to solo some of Sheol A, maybe all of it depending on how lucky you get. Players tend to not group up for Sheols A and B, as they're fairly easy to solo once decked out in good gear. You can enter by speaking to the ??? to speak to a Pilgrim Moogle in Rabao (G-6), who will give you a Each floor of the dungeon has groups of 10 enemies, called Nostros mobs. All enemies in Odyssey will aggro both sound and sight, even if they normally don't, so be careful! Arcana enemies will also still aggro magic, and Undead will still aggro low hp. On odd-numbered floors, there will also be an Agon Halo placed in one of the enemy groups. Around this halo there will be various near-invisible beastmen, which will aggro true sight and sound. The beastmen cannot be targeted, but CAN attack you - destroying the Agon Halo will make them finally targetable, assuming they haven't killed you by then. Wiping out a full group of enemies, beastmen included, gets extra rewards. | |
| Moogle Mastery | |
|
As you perform various actions in Odyssey, you earn Moogle Mastery - a point system that makes farming in Odyssey easier in general. The more Moogle Mastery you have, the stronger your trusts are in Odyssey and the cheaper it will be to open chests or spawn NMs. Moogle Mastery is increased by doing almost everything in Odyssey - killing enemies, the Agon Halos, NMs, and opening chests. Note that it's more important to do a variety of content rather than focusing on one thing - you can't max out Moogle Mastery by ONLY killing NMs, or ONLY opening chests, etc. Unfortunately, there are currently conflicting reports of how precisely one raises Moogle Mastery, and the precise numbers aren't fully known yet. | |
| Odyssey Rewards | |
|
The primary rewards from Odyssey are "Lustreless" items (Lustreless Scales, Lustreless Hides, and Lustreless Wings) which are used to augment Unity Equipment. You can only enter Odyssey once every 20 hours, and it's a good idea to get into the habit of doing so. Once fully augmented, many of the UNM items can be extremely powerful, often best in slot. Even if you don't have any interest in the augmented UNM gear, Lustreless items are also in high demand so you can also sell them pretty quickly and easily for a tidy profit as well. You likely aren't geared enough now to fully clear Sheol A, but you ARE geared enough to do some farming to get some Lustreless Scales and get started either selling them or augmenting some of your UNM gear. | |
Alternative Vagary Battlefields
| Vagary Overview | |
Vagary is an event that is fairly complicated, but luckily you don't need to know a ton to begin participating in it. While you CAN start participating in the primary version of Vagary, which requires at least 3 players and thus cannot be solo'd, it's not commonly ran anymore. The rewards from Vagary can still sell for a decent amount of gil, but the equipment drops are mostly niche. The most relevant reward from Vagary is unlocking the ability to upgrade your Reforged Empyrean Armor to +1, however there are alternative battlefields availabe to unlock them. These alternate battles do not give any other rewards - no exp, no equipment drops, can't complete RoE objectives, etc - but they can be entered solo with trusts, or with a few friends if you want. These days, most players just tackle these Alternate Battlefields instead of doing Vagary proper. There are five battlefields, each against a single boss - each one you defeat will unlock the ability to upgrade one of your Reforged Emp. Armor pieces. Entering Vagary | |
| Battlefields | |
|
There are five battlefields available, each containing a single boss from Vagary. You'll have thirty minutes to complete the fight, but this usually won't be an issue. After completing Watery Grave
After completing Reckoning (Mission)
After completing Abomination
Once you have defeated a boss succesfully, you'll be able to upgrade the corresponding Reforged Empyrean Armor via Monisette in Port Jeuno (I-8). The items needed to perform the upgrades can be earned from regular Vagary, or you can purchase them off the Auction House or from player bazaars. | |


Escha Ru'Aun Geas Fete
| Geas Fete Overview | |
Geas Fete is a really weird name for a fairly simple system. In Escha - Ru'Aun you can get Key Items from Dremi to spawn bosses that have a wide variety of drops. Almost every job can get something useful from these fights, so they're definitely worth looking in to. The bosses also drop Abjurations, which we touched upon back in the NQ Abjuration Gear section of this guide. While I advised buying them with DI points earlier, this is how you get them for free! Well, "free" - you'll still need to spend a bit of gil to pop the bosses. | |
| Geas Fete Bosses | |
|
To spawn a boss for Geas Fete, first look up the items requested for the boss - once you have the item for the boss(es) you want to fight, trade them to Dremi and request the appropriate Key Item for your boss. All the Tier 1 NMs can be spawned with any item from a big list; the cheapest item tends to be Bhefhel Marlin, but those don't stack in your inventory so you may be better off with two Steel Ingots. Once you get the KI for your boss, you'll need either a Tribulens or a Radialens, also obtained from Dremi in exchange for Escha Silt. The tribulens is good for a single boss spawn, then needs to be purchased again (at an increasingly more expensive price, until you go 30m without buying one). A radialens will let you fight an unlimited number of bosses, but expires after an hour irl time, or when you leave Escha. It's generally recommended to buy a radialens, unless you're only planning on fighting one or two bosses. Both for convenience (so you don't need to keep running back to Dremi) but also for saving silt. This is normally where I would outline all the bosses and their gimmicks, but honestly there are just way too many to cover here. The Escha page lists all the bosses, I recommend spending some time looking through them and seeing which ones have drops relevant to your job. You can probably solo most of the Tier 1 NMs by now, but some of the Caturae might be risky - bring along a friend or two and you should be safe. Tier 2 and Tier 3 NMs will require a few other people, though. Drops aren't guaranteed though, so it's probably a good idea to bring along multiple pop items. | |
How to Earn Gil as an Experienced Player
| Overview | |
|
You should now be geared enough to solo some harder content, so the options available to you for making gil are more robust now. All the old methods still apply as well, so don't forget about them! Like mentioned before, earning gil in FFXI is a matter of consistently making smaller amounts that will add up. | |
| Ambuscade | |
|
Ambuscade is an excellent way to earn gil at this point. You generally should be getting upgrade materials you need first, but after that look into buying items to sell. What's available shifts month to month, but things to look out for are: Heavy Metal Plates, Alexandrite, Riftcinder, Riftdross, High-Purity Bayld, and Beitetsu. Check out the Ambuscade Rewards page to see how many Hallmarks/Gallantry each of these cost, and then check the auction house prices on your server to see what is most worth spending your Hallmarks on. | |
| UNMs | |
|
It may be worth considering spending your Unity Accolades on spawning UNMs rather than purely on Prize Powders. Spawning UNMs does NOT count toward your 100,000 weekly accolade limit, and their drops can get you a good bit of pocket change. Notable UNMs to consider farming are Warblade Beak, Voso, Tiyanak, Joyous Green, Emperor Arthro, Valkurm Imperator, and Jester Malatrix. Most of these are fairly easy to solo and stacks of their drops can net you a good chunk of gil. In general I recommend looking through the list of UNMs to see what you can handle and how much their drops sell for on your server. | |
| Odyssey Sheol A Lockpicking | |
|
Now that you're familiar with Odyssey, it's a good idea to try farming the chests for Lustreless Scales. This is done by going as a THF and picking the locks of the chests with Living Keys and Skeleton Keys, and subbing WHM for sneak/invis. WHM sub also gives infinite reraise, which is useful as getting a Mimic from a chest is otherwise certain death. You may not have THF at 99 and WHM at 49, but it may be worth considering leveling them up solely for this purpose. On average you can expect to get 100-200 lustreless scales per run, which is easy money you can get every day. When you head to Sheol to pick some locks, you want to summon as many tank trusts as you can, along with a healer and maybe a support. Skeleton Keys have the lowest chance of resulting in a mimic, but are much more expensive compared to Living Keys. If you get a mimic while picking, you want to engage quickly so the tanks can grab hate. You then want to run at least 20' away from the mimic and let a normal mob kill you in a place that's safe to reraise. Mimics can draw in, so you need a tank to distract it. Mimics also have an aggro range of around 20', so you need quite a bit of distance between you and it in order to reraise safely. When it comes to picking the locks, you want to take care that getting a mimic won't cause you to die immediately due to getting aggro from nearby monsters. If one of the chests is near a group of monsters, you can either avoid it and come back later after picking all the other safe chests or you can try using a Skeleton Key for a better chance at avoiding a mimic. Remember that undead enemies will still aggro low health, so it's generally not safe to pick any chests that are near undead. NextGames on youtube has an excellent video guide on how to farm Odyssey chests as well, if you'd like an example of how to do this safely. | |
Omen
| Omen Overview | |
Omen is a very popular bit of endgame content, that requires you to have completed the Rhapsodies of Vana'Diel storyline. If you haven't done so yet, DO IT NOW! Omen is a super important piece of endgame content, so hop to it. Omen involves you (and likely a full party if not full alliance) going through multiple floors / rooms and fighting either groups of enemies or individual bosses. Rewards from Omen come in two major varieties: Job Cards / Scales, and Equipment. There's tons of good equipment in Omen, but there's also Job Cards and various Scales, which are used to upgrade your reforged AF to +2 and +3, respectively. You enter Omen by first talking to Incantrix in Reisenjima, though Ethereal Ingress #10. He will give you a | |
| Omen Objectives | |
|
Once in Omen, your group will be given a random Main Objective, and several random Additional Objectives, all of which are stated in your chat log.
At first you'll only have 10 minutes in Omen, but completing main objectives and moving on to new floors will increase that time limit, up to a maximum of 50 minutes. Each floor of Omen will either have multiple large swarms of "Sweetwater" monsters each with one stronger "Transcendent" monster, or there will only be one individual boss. The first two floors each contain two swarms of monsters. After this your group can choose to go to a floor containing only a boss by selecting "Go into the larger light" after the second floor, this is the midboss. After beating the midboss (or choosing not to skip its floor) you'll enter a large floor with 4-7 swarms - there will be more swarms if you skipped the midboss floor. If your group killed the midboss then after this floor you can proceed to fight the previously-selected Omen boss. If you skipped the midboss by selecting "Go into the smaller light" after the second floor, then the Omen run ends after this larger floor. Generally when your group enters Omen, it will have one of two main goals: Job Card farming, or taking out the bosses. If your group is card farming, then the jobs chosen will generally be those that can easily fulfill Additional Objectives - Samurai for easy skillchains, Black Mages for easy Magic Bursts, etc. These groups will tend to skip the midboss, since the group likely may not be set up to take it out - and it doesn't give Additional Objectives anyways. If your group is tackling bosses, then they will generally ignore any Additional Objectives that aren't very easy, and will usually focus on clearing the floors relatively quickly to have more time to fight the bosses. Boss attempts will involve more traditional party / alliance setups. Omens & Bonus Floor | |
| Omen Bosses | |
|
There are 3 possible midbosses for Omen, 5 typical final bosses, and 1 special superboss. All of the boss' HP scales with the number of players, so a full alliance may not alwasy be the best choice for taking them down. Which midboss you encounter is entirely random - because of this, if you want one of their drops, it may take quite a while as the drops themselves aren't guaranteed either. For the 5 main bosses, the party leader will select which one to encounter after defeating the midboss. Each main boss can drop scales and equipment - which scale you'll need to upgrade your AF to +3 will depend on your job. To fight the megaboss, Ou, you'll need to have Key Items from all 5 of the previous main bosses (or at least, the party leader will need them). You then take the smaller light after the second floor, and after the third floor the leader can choose to face Ou. Note that when Ou is encountered, ALL alliance members will lose ALL of their Key Items, even if they don't have all 5 needed. You likely won't be well-geared enough to tackle Ou until you get some drops from the other bosses here in Omen, but it's good to know for later. Mid Bosses
Main Bosses
Ou
Killing Ou requires a lot of careful coordination among your group. Melee DPS will often take "shifts" moving in and out depending on the phase Ou is in, with ranged / magic / pet jobs dealing damage in exchange. Listen carefully to your alliance's leader to ensure you're doing the right thing at the right time. | |
| Omen Rewards | |
|
As mentioned earlier, your group will generally be aiming for Job Cards or boss drops when entering Omen. If you're not clear on which your group is aiming for (usually it's specified beforehand) then feel free to just ask your alliance leader. Below I'll list some notable rewards from Omen. Note that there are more rewards than those just listed here, so I recommend looking at the Omen page along with looking at the pages for specific Omen bosses to see if they drop anything relevant that's more specific to your job. All Jobs
Heavy DD
Light DD
Tanks
Mages
Pet Jobs
Ranged Jobs
| |
Dynamis Divergence - Waves 1 & 2
| Dyna-D Overview | |
Dynamis Divergence, also called Dyna D, is the current major endgame piece of content (as of Dec 2020) and is basically an ilvl version of classic Dynamis from 2007. It provides a variety of rewards, many of which can be used to upgrade your reforged relic armor to +2 and +3 - or sold for quite a lot of gil! While it can be farmed with a small party, much more often it is ran with a full alliance of 18 players. This is due to the "lockout" period - after entering any Dyna D zone, you'll need to wait 60 hours earth-time before you can re-enter - so players tend to bring a full alliance, so they can get more bang for their buck. In order to enter any Dynamis Divergence zone, you must first beat Dynamis Tavnazia at least once, and complete all Rhapsodies of Vana'diel missions. After completing both of these, examine the ??? in Ru'Lude Gardens (G-8) (near the AH) to speak with Aurix the goblin. Then trade the one of either So what actually happens in Dynamis Divergence? Just like regular Dynamis, you'll be in a shadow-version of the four main nations. These areas will be populated by beastmen statues that either stand in a designated spot, or wander on a preset path. If one is aggroed, it will spawn a group of beastmen enemies, each of which is capable of using its job's SP move. "Wave 1" is the group of spawned statues that are present when entering Dynamis, and there will also be a boss spawned from the start. When this boss is killed, all remaining Wave 1 statues will despawn and a full new set will spawn, Wave 2. A second boss will also spawn, which is significantly more difficult than the first. You may not be ready to meaningfully contribute to the Wave 2 boss yet, but you can still meaningfully contribute to killing Wave 1 and 2 mobs! When first entering Dyna D, your group will have a 60m time limit. Every time a statue is killed, 1 minute will be added to the time limit. When a boss is killed, 30 minutes (minus any time added by killing that wave's statues) will be added. The time limit can be raised to a maximum of 120 minutes. Generally, groups will work through Wave 1, killing statues and NMs to farm drops. Alliances will usually have Corsairs that are well-equipped enough to one-shot statues with a weapon skill, which will give the 1 minute time extension but NOT spawn the corresponding mobs. This is done to give more time for farming, since there usually won't be enough time to farm both waves. Note - When the Wave 2 boss is killed, there will be a Wave 3 of enemies and a new boss, but that's some of the hardest content in the game (as of Dec 2020) and you're unfortunately not ready for that yet. | |


| Statues | |
|
When first entering Dynamis Divergence, all the enemies will be Statues with strange icons on their nameplates - a moon, a snowflake, or a cherry blossom petal. These icons correspond to the glow of the statue's eyes, and aggroing the statue will result in different effects depending on the color of their eyes / the icon on the nameplate. Most statues will cycle back and forth between All statues will aggro True Sight, and they will link - if you're pulling, be VERY careful to only grab one statue at a time, otherwise your group may get overwhelmed and wipe. Dyna D Bastok Dyna D San d'Oria Dyna D Windurst Dyna D Jeuno NMs Aurix | |


| Bosses | |
|
At this point, you're likely only going to be fighting the Wave 1 boss, and MAYBE some attempts at the Wave 2 boss, depending on the rest of your alliance. The Wave 1 boss is very similar across all four Dyna D zones, but the Wave 2 bosses are more unique, but all go through a "phase change" at 50% HP, where they become MUCH more threatening. If your alliance wipes against one of these bosses and they regen back up to 100%, they will remain in this second phase and generally be unbeatable. This usually means the attempt at killing them is a failure, even with lots of time left on the clock. All the W2 bosses also have powerful AOE moves, and are often fought by having the tank pull the boss to a lower area, while the rest of the party pelts the boss with ranged attacks and magic from a higher area that won't be hit by the AOEs. Wave 1 Bosses Note that as soon as the statue dies Wave 2 statues will spawn. Particularly in Dyna D Windurst, it's VERY easy to accidentally aggro statues as soon as they spawn. Don't be That Guy that aggros a bunch of statues as soon as Wave 2 starts and wipes the alliance. The Wave 2 bosses will ALSO spawn immediately, but usually you won't be in a position to worry about immediately pissing them off. Bastok W2 Boss - Ka'Rho Fearsinger San d'Oria W2 Boss - Halphas What this all adds up to is a fight where mages need to constantly be applying Dispel to get rid of his potent buffs, but in order to get in range they risk getting one-shotted by Yarkushta. If they stay at range, then when Halphas uses Full-On Tackle the tank will be gravity'd be unable to catch up to the boss when it runs off to go kill the mages that are standing at a distance. The general strategy to beating him is to pull him over to one of the walls that run along the Ronfaure zones, and have mages stay atop the walls in order to safely be out of range of Yarkushta but still be able to heal, debuff, etc. When the boss uses Full-On Tackle, a secondary tank needs to be ready to pull hate ASAP, since the primary tank likely won't be able to as the boss runs off to try to get up to the mages. This fight can go south VERY quickly, and will require a very coordinated team in order to take down. Windurst W2 boss - Fii Pexu the Eternal The main thing to look out for when fighting him is the AOE, as it can really mess up your mages. Fighting him at the Heaven's Tower bridge is recommended, so mages / ranged attackers can safely stand atop of it and still be in range to hit the boss - tank pulls the boss over to where the home point crystal would be, and the rest of the party stays on the bridge. A skilled healer is important in this fight to get rid of status effects and keep anyone alive that is getting hit by AOE spam, and a RDM or SMN to debuff is potent regen and regain. Jeuno W2 Boss - Obstatrix | |
| General Advice & Tips | |
| |
| Dynamis Divergence Rewards | |
|
The main reward from Waves 1 and 2 of Dyna D are materials to upgrade reforged relic armor to +2 and +3. This is primarily done through "shard" items and "void" items. For example, to upgrade your relic headgear you'll need "Headshards" specific to your job, and for +3 you'll also need job-specific "Voidheads". These are rarely dropped off of mobs of the corresponding job, and are highly likely to drop off of Red-Eyed statue NMs. Wave 1 tends to drop shards, while W2 tends to drop voids. Shards and voids can also be bought from bazaars and the AH, so if you're only missing one or two (or don't feel like farming more Dyna) then you can just go that route. It is worth noting that depending on your jobs, these can be VERY expensive. The other main reward from W1/W2 Dyna D are the various Dyna D currencies. There's a ton of them, but the most relevant ones are Rusted I. Cards and Beastmen's Medals.
You can buy the neck pieces off of the AH or out of players' bazaars. Because of their strength, the +2 versions are often very expensive - easily costing 50m+ depending on job and server. The +1 versions are often much more reasonably priced, costing around 10m or less. The base versions are usually dirt cheap, luckily. I recommend At least shelling out for the +1 version for your job, and saving up for the +2 version if you're really serious about pursuing your job. To augment the pieces, you need to RP towards them. This can be done by trading the piece along with a Heroism Crystal for 10 RP or a Heroism Aggregate for 50 RP. Whenever you have the piece of gear equipped when a Dyna D beastman dies, you'll also get RP - 10 points for a W1 monster and 20 for a W1 boss, doubling to 20/40 for W2. The crystals / aggregates drop in Dyna D, or can be bought off the AH. NQ Necks cap out at Rank 15, which requires a total of 5,950 RP; +1 Necks cap out at R20, requiring 13,060; and +2 necks cap at R25 needing a total of 25,150 RP. These can be VERY expensive to try to just buy all the crystals/aggregates required to max out, so it's recommended to go with a mix of buying materials, killing Dyna monsters, and getting Dyna drops to max them out. | |
Ambuscade - Very Difficult & Pulse Weapons
| Ambu VD Overview | |
By now you should be well-geared enough to start tackling V1VD Ambuscades. It's recommended at this point you have multiple +2 versions of Ambuscade Armor, and multiple different variations of your job's Ambuscade Cape. If you're using an ambuscade weapon, you definitely want it upgraded to the Kaja version by now as well, or maybe even the final version, which requires a Pulse Weapon. | |
| Pulse Weapons | |
|
While you can't earn a Pulse Weapon from Ambuscade, you DO need to use a pulse weapon to fully upgrade an Ambuscade Weapon. Pulse Weapons aren't anything special on their own, but are necessary to upgrade a Kaja Weapon to its final form. There are multiple ways to get a Pulse Weapon, but unfortunately none of them are particularly easy. Fortunately, you don't need a specific pulse weapon to upgrade your Kaja Weapon - any pulse can be used to upgrade any Kaja. You can trade the pulse knuckles to upgrade the kaja knife, for example. Here are some options for acquiring a pulse of your own:
| |
Level 125-128 UNMs
| Lv 125-128 UNMs Overview | |
By now you can probably solo most lvl 125 UNMs. Some are harder than others of course, but for the most part they should be easy enough for you. There are also some lv 128 UNMs that you may be able to solo, but become much easier with a friend or two. There's too many possible rewards here to list off, including lots of ones that are job-specific, so head on over to the UNM page to see what's available for your job. | |
Odyssey - Sheol B
| Sheol B Overview | |
|
At this point, you probably will want to consider tackling Sheol B in Odyssey. To unlock Sheol B, you'll need to have reached the end of Sheol A while having the appropriate Records of Eminence objective set. The objective is under Content > Odyssey > Sheol A. Once completing, you'll then be able to enter Sheol B. B works the same as A, but with different enemies, a different layout, and by rewarding Lustreless Hides instead of scales. Hides can be used to upgrade different UNM equipment, primarily from the level 125 UNMs we just covered! Hides also sell for even more gil than Scales, so they can be good moneymakers too. | |
Reisenjima Geas Fete
| Reisenjima Geas Fete Overview | |
Just like Escha Ru'Aun, Reisenjima has its own set of Geas Fete NMs to tackle. With exceptional gear these bosses can be soloed by some jobs (RDM, BLU, NIN, DNC, maybe BST and PUP?), but otherwise you'll need a group to defeat them. Much of the drops from these NMs are rewards in the Domain Invasion 800-point category. So while you may already have much of the gear, it's nice to get ones for "free" without needing to farm DI for days. Also, there are some pieces of gear which cannot be gained elsewhere, and are often very strong. The list of NMs is quite long, a bit too long to fully tackle here, so I recommend you read through and see which ones have drops relevant to your job and then check their wiki pages to see strategies for defeating them. | |
Sinister Reign
| Sinister Reign Overview | |
At this point you're plenty ready to tackle Sinister Reign, and if you have yet to complete the SoA storyline now is a good time to prioritize it. Here you can get some amazing gear, but it'll require some luck. Sinister Reign, better known as SR, is a short event where a group faces off against three bosses in a row. Which bosses are faced is randomly selected, and the rewards earned have random augments on them. Because of this, it can take quite a lot of attempts to get the drops you need. There is good news, though! With good / perfect augments, these pieces are VERY strong, and are often best in slot. Furthermore, SR goes by VERY quickly - the bosses are fairly trivial at ilvl, and so a reasonably well-geared group will wipe the floor with them. Thus, each run will only take a few minutes, so most groups do a dozen or so runs in a row. In order to enter SR, you must speak to Malobra in Ra'Kaznar Inner Court (I-8) and pay him 5,000 bayld in exchange for a I could go into detail on the mechanics of each boss, but honestly all of them will die too quickly for it to matter much. Just avoid standing in front of a boss (unless you're a tank) to ensure you don't get hit by any conal attacks or counters, and you'll probably be fine. You might be wondering if the fights are so easy, why not solo them? It's fully possible, but the problem is that the drop rates for well-augmented gear is very low, so attempting to solo it will take quite a long time to get any reasonable rewards. | |
HQ Abjuration Gear
| HQ Abjuration Overview | |
|
Remember NQ Abjurations? Well, now is a good time to look into upgrading them to their HQ versions! These can be quite pricey, but are definitely worth the cost. As a reminder, you can buy the abjurations themselves using Domain Invasion points, or you can farm them from various Escha Ru'aun Geas Fete NMs. You're more than well-geared enough by now to likely solo many of the NMs, depending on your job, so I recommend taking that route instead, depending on the specific piece you need. | |
How to Earn Gil as an Advanced Player
| Overview | |
|
At this point you have quite a lot of options available for earning gil. All the previous options listed in the beginner and experienced sections still apply, but here I'll list some new ways you can earn gil that have opened up to you. Remember to keep in mind that making gil in FFXI is more about steadily earning money every day, not just trying to get huge chunks of gil all at once. | |
| Omen | |
|
At this point you can likely solo farm Omen fairly easily, if you avoid the bosses. The primary item you're looking for is S. Astral Detritus, which can sell for a good amount on the AH. With THF sub, you can expect to get between 5-10 of them per run. Simply make sure that on the second floor of Omen, you choose to walk into the "smaller light" instead of the "light" - this will avoid the Omen midboss. As an added bonus, farming Omen will also net you some free Paragon Job Cards to help +2 / +3 your AF gear. | |
| Odyssey Sheol B Lockpicking | |
|
Just like farming Sheol A, Sheol B is a great place to lockpick chests as a THF/WHM. By now you should have no problem leveling THF up to 99 and WHM up to 49, and it's very much worth it to farm Lustreless Hides from Sheol B chests. | |
| Monthly Campaigns | |
|
It's a good idea to keep an eye on the monthly campaigns for gil-making opportunities. Obviously this changes from month to month, but most months have at least one or two campaigns that can be very good for moneymaking. Some notable ones are:
| |
Geas Fete HELMs & Gods
| Overview | |
Around this time you should be well-geared enough to help contribute meaningfully to Geas Fete Gods and HELM NMs. These are the hardest Geas Fete bosses, and come with some of the best rewards! The HELMs are spawned with items gained from HELM'ing - Harvesting, Excavating, Logging, and Mining - but you'll probably just go buy them from the Auction House. | |
| Escha Zi'Tah HELMs | |
|
Most of the Escha Zi'Tah HELMs are luckily not too threatening. A well-geared party shouldn't struggle with any of them, with the exception of the strongest one, Wrathare. Wrathare has en-death on its regular attacks, and has quite high evasion and can give itself a large number of shadows to avoid damage, and can reset enmity often. It's usually fought without too many melee players, to avoid feeding it too much TP. | |
| Escha Ru'Aun Gods | |
|
Escha Ru'Aun has a set of Geas Fete NMs referred to as Gods, the equivalent of HELMs for the zone. The Escha Ru'Aun Gods are much more threatening compared to Zi'Tah's HELMs, and most of them require a coordinated group that pay close attention to the mechanics.
Kirin Warder of Courage
If WoC gets off a Benediction after entering bracelets mode, the fight is essentially over as it will remain in bracelets mode. Defeating WoC unfortunately largely comes down to luck, as many of its SP abilities can end the fight outright. However, there are some countermeasures your team can take! If an elemental spell hits WoC within 1-2 seconds of it using an SP ability, that ability will prevent the SP from going off. Specific elements are needed to counter specific SPs:
Often groups will prioritize Wind damage in an attempt to prevent a fight reset with Benediction or to prevent the wynavs from being summoned. Water damage is also useful to prevent Mijin Gakure causing a wipe. However, even with these counters, the window to stop an SP ability is very tight and problems can easily occur even with an attentive group. So what about Warder of Courage's abilities aside from SP ones? Luckily they're nothing really to write home about. The only notable one is Medusa Javelin which will cause a very potent Petrify. Your healer should be prepare to stona, and should set up the tank with barstone / barpetrify. While all this may make WoC sound super imposing (and it is), it's actually not the hardest fight in the universe. Much of it comes down to being able to prepare for its bad SPs and kill it before it gets a chance to really unleash hell. With lucky choices of SPs, it can actually be a surprisingly easy fight. The threat comes from the variance, and possibility for disaster. | |

| Reisenjima HELMs | |
|
Reisenjima's HELMs are the big leagues. Each can be extremely difficult, on par with Kirin or Warder of Courage. Albumen Erinys Onychophora Zerde Schah
The priority of which adds to kill tends to vary from group to group, so check with your leader on the order to kill them. The main obstacle when it comes to Schah is the time limit. The first half of the fight needs to be spent killing the adds, and that leaves considerably little time to kill Schah itself. Some groups choose to leave the Mantri alive in order to save time, since Schah will only get the -DT% effect if two or more adds are alive. However, that isn't to say Schah itself is a pushover. Because Schah uses all of the adds' unique abilities, this means you have to deal with constant Zombie, dispels, dread spikes, Stygian Sphere, and charms. What may be worst of all is Banneret Charge, which will reduce everyones' HP down to 1 - if you still have Bio from Besieger's Bane then it's an instant alliance wipe. Even if bio's been cleared, Schah has access to AOE spells and isn't afraid to use them. Schah is a very difficult fight, but if your group is coordinated and skilled then you should be able to take it down. Teles
When the SP ability ends, there will be a second SP animation, signaling her returning to her normal AI behavior. Similarly to Warder of Courage, if ice or dark damage is deal just as she uses an SP, there's a chance to interrupt the SP and either force her to use a different one, or cancel it entirely. Finally, if large damage is dealt to her from a range (either via ranged attacks or magic), then she will reset her hate on the tank. This often encourages her to use Clarsach Call, which deals very strong wind damage in a VERY large AOE, and gives Teles a variety of stat buffs. Teles is a very chaotic fight, but luckily you always know when an SP is going to come up. If she uses Invincible your group will need to back away ASAP to not get melted by her Dia aura, and the tank will need to use Lucid Potion IIIs and any other healing they have at their disposal, as the group healer likely may not be able to get close enough to support them without taking significant Dia damage. When she uses Soul Voice your tank will need to be quick with the Charm Buffer, and if she uses it multiple times then hope your tank has a good magic evasion / resist set. While muted your tank will also likely have trouble keeping hate, doubly so if Clarsach Call goes off, so your party's DDs should take it easy to not steal hate. Vinipata
Whenever Vinipata switches stances, it will also remove all of its debuffs and wipe 3 buffs from anyone around it. Vinipata is a major threat, and will pump out huge damage numbers while also resetting hate constantly. There's really no right answer for fighting Vini - a melee strategy means he will be spamming Max HP down along with Weakness (very big problem with how strong he hits) and short-count dooms. A magic strategy means he'll be resetting hate left and right while also obliterating your party's stats. Beating Vini is a matter of holding on for dear life and doing your best. Good luck. | |
Dynamis D. - Wave 3
| Wave 3 Overview | |
You're finally ready to tackle Dynamis Divergence Wave 3, which is currently some of the hardest content in the game. Wave 3 works differently from the previous waves - there are no statues to deal with anymore. Instead, elemental circles are scattered around the zone, and can be defeated to weaken the final boss of the wave, which can be fought at any time. Fighting (or better yet, defeating) the boss will earn progress toward transforming a Masks of Darkness into a Mask of Light, which is required for augmenting Ultimate Weapons (REMA), or at the very least for free M. Astral Detritus, which can be used to augment your REMA or can be sold for a fair bit of gil. Wave 3 is time consuming and difficult, so when your alliance is going to attempt it, they will likely rush through Waves 1 and 2 as fast as possible, killing as few enemies as possible. Even for experienced groups, killing the Wave 3 boss within the time limit is very challenging - you'll need to be at the top of your game, regardless of your job or role in the party. | |
| Elemental Circles | |
|
Replacing the statues from Waves 1/2, Elemental Circles are the primary target for much of Wave 3. After defeating the Wave 2 boss of the zone, 8 Elemental Circles will spawn in preset locations throughout the zone - one for each element. Destroying the circles will weaken the Wave 3 boss in various ways (elaborated on in a bit), so most groups will attempt to destroy all 8 circles before tackling the boss itself. Each Elemental Circle will be protected by a group of Volte mobs - there will be 3 normal mobs, and 1 NM. Just like with W1/W2, each of these enemies and NMs has a dedicated job associated with it and can use said job's SP move. Once an action is taken on the circle, it will "Aggro" and spawn a Disjoined ??? NM, which is very strong. Additionally, if whoever the circle has hate on is within 15', the circle will constantly pulse out elemental AOE damage. Generally, groups will pull the initial enemies and NMs a safe distance away from the circle to kill them, and then engage the circle to finish it off. When engaging the circle, one tank will pull the Disjoined ??? away from the group and hold it there while the rest of the group kills the circle - defeating it will also despawn the Disjoined ???. A second tank will establish hate on the circle itself while staying at least 15' away from the circle, so the rest of the alliance can defeat it. A second strategy for clearing the circles is a sacrificial one - one or two party members (usually beefy tanks) are considered the "sac pullers" and will run through the circle, aggroing all the mobs including the Disjoined ???. The sac pullers will then run to a safe location to die while the rest of the party kills the circle. The sac pullers will then reraise when it is safe to do so and rejoin the rest of the group. This method is faster, but riskier - if the party can't defeat the circle before the mobs return, then it will likely result in a wipe. Furthermore, it kind of sucks to be the sac pullers. However, it's hard to deny that if your group is struggling to defeat all 8 circles in time to beat the final boss, this is an effective strategy to save time. | |
| Disjoined Bosses | |
|
Each of the Dyna D zones has their own unique Wave 3 final boss, but they actually all share the same mechanics and have only minor differences. Bastok has Disjoined Galka, San d'Oria has Disjoined Elvaan, Windurst has Disjoined Tarutaru, and Jeuno has Disjoined Mithra. By default each boss has a native -80% DT trait and will absorb all elemental damage. However, every time you defeat an Elemental Circle, the boss will lose 10% of its DT, stop absorbing that element, and lose all DT for the opposing element. For example, destroying the Fire Circle will make the boss stop absorbing Fire damage, and will make the boss take full damage from Ice. Note, however, that the boss still does absorb Ice damage until the Ice Circle is destroyed. Additionally, every 20% HP the boss loses, it will spawn 4 Volte helper mobs - this will occur at 80%, 60%, 40%, and 20%. These mobs need to be killed ASAP, and your alliance leader will likely call out a priority for doing so. Note that these mobs will have access to their jobs' SP abilities, which means a Benediction can fully heal the Disjoined Boss. Volte Corsairs cal also use Wild Card, which will ALSO fully heal the Disjoined Boss, also making it a top priority. Other notable threats are Volte Ninjas and Volte Summoners for Mijin Gakure and Astral Flow, and Volte Beastmasters for charm. If that wasn't enough, at any point in the fight, the Disjoined Boss can summon Disjoined's Odin, which will immediately use Shin-Zantetsuken, an AOE Death move. However, if you have reraise up, then instead it will simply wipe your reraise. The boss summoning Odin is a hard reraise check - if you don't have reraise up, you WILL die. Don't be the only one in the alliance without reraise and force your healer to spend time raising you instead of keeping the tank alive. Carry MULTIPLE sources of reraise on you at all times to prepare for this, because the Disjoined Boss can summon Odin multiple times per fight. Each Disjoined Boss can also use multiple different SP abilities and spells, and have access to special AOE weapon skills. Common SPs are Mighty Strikes, Perfect Dodge and Invincible. It's heavily recommended that the boss is kept silenced, as it can easily spam very disruptive spells such as Silencega - ensure your alliance has a RDM with a strong magic accuracy set for landing these. Finally, there ARE some slight differences between the bosses, outlined here:
Aside from all of these points though, the bosses are fairly straightforward with no tricky mechanics to deal with or plan around. Killing the boss is mostly a matter of how well-geared your alliance is, because everyone needs to be at the top of their games. The tanks need to be geared enough to take serious punishment, DDs need to be geared enough to kill him within the time limit, supports need to be geared enough to provide strong buffs and to be able to land debuffs, and healers need to be geared enough to keep everyone alive and free of status effects. Good luck. | |
| Masks of Light / Darkness | |
|
The first time you defeat an elemental circle in a zone, you'll receive a Mask of Darkness Key Item for the zone - a Galka Mask of Darkness for Bastok, an Elvaan Mask of Darkness for San d'Oria, a Tarutaru Mask of Darkness for Windurst, and a Mithra Mask of Darkness for Jeuno. As your alliance deals damage to that zone's Disjoined Boss, the Mask will gain progress, tracked via a meter in the upper-left corner of the screen while in Dyna D. If the boss is defeated then the mask's meter will instantly fill up, and the mask will change to a Galka Mask of Light, Elvaan Mask of Light, Tarutaru Mask of Light, or Mithra Mask of Light depending on the zone. Note that you personally don't need to deal the damage, you just need to be in an alliance with people dealing the damage. If your alliance can't kill the boss in time, the meter will keep its progress and resume when you return to that dyna zone. A grand total of 30,000,000 HP worth of damage needs to be tracked by the mask to fill it - the bosses have 20,000,000 HP, for reference. So what does a Mask of Light do? If you've made one of the Ultimate Weapons (REMA Weapons) yet, then you can begin augmenting it once you attain a Mask of Light. If you don't have one yet (not surprising if you don't), then the first time you fill up the mask won't mean much. However, after you fill up the Mask the first time, you can get ANOTHER Mask of Darkness to begin filling up. Whenever additional masks are filled, you will receive a free M. Astral Detritus. These can be used to fill progress in a REMA augment, but can also be sold on the auction house for a good amount of gil. | |
Odyssey - Sheol C & Segment Farming
| Sheol C Overview | |
|
Just like Sheol B, Sheol C is a yet more difficult series of floors, now providing Lustreless Wings rather than Lustreless Hides. These are unfortunately less in-demand that Hides, as they are used to augment fewer pieces of equipment. However, Sheol C does have a benefit - it's the best Sheol to use for farming Moogle Segments, a currency used for entering Sheol Gaol, which is the ultimate goal of all this Odyssey stuff. The Gaol is a huge series of boss fights, and rewards some of the strongest gear in the game - however, you'll need a lot of "segments" to enter it repeatedly, so we'll cover Segment Farming first. | |
| Segment Farming Overview | |
|
Moogle Segments are a currency that's in extremely high demand in order to repeatedly enter and farm Sheol Gaol. While you CAN farm segments solo with trusts, it will be very slow and inefficient; I recommend going with a few friends at the very least. Sheol C enemies are very threatening, so if you're solo farming it may be worth trying to farm in Sheols A or B instead for better safety. If you have a coordinated party though, or a few skilled friends, then farming Sheol C is the way to go. Generally, a PLD will gather up an entire group of enemies, then a BRD will put them all to sleep. Then the group will kill them one by one as quickly as possible, then repeat the process again with the next group. DDs slots are pretty flexible, but ideally they'll be jobs that can target different damage weaknesses to clear groups faster. Healers tend to be WHMs, but SCHs can work too. CORs are commonly brought along for the movespeed buff, as well as their good damage and general buffs. Groups usually tend to head straight toward the final goal of Sheol C, killing as many enemy groups as possible on the way. Reaching the end goal gives bonus gil based off how many enemies were killed, which adds up quite quickly to a free 1m+ gil on a good run. Groups may skip over specific enemy packs that can't be slept or are too difficult for the group to kill quickly. NOTE: Segment farming groups are fairly common in /yell chat (as of writing), however many players have very high standards for these groups. Since each player can only enter once per day, most groups will expect players to already know what to do and to be efficient so as not to "waste" the entry. If you're inexperienced with farming segments, I recommend either forming a party yourself while advertising it's a learning run or do a few runs with friends. If you haven't got any friends to run with, then it doesn't hurt to send a /tell to a recruiting party and let them know you're new but wanting to learn. | |
Odyssey - Sheol Gaol
| Sheol Gaol Overview | |
Sheol Gaol (pronounced 'jail') is the end goal of Odyssey, and it has some very interesting mechanics that make it unique among FFXI's endgame. The event itself will pit you against up to 3 NMs of your choice in a row, with a resting area in between each. What makes Gaol so unique is that subjobs are disabled, multiple of the same jobs cannot be used, and once a job is used against one boss, no one in the party can bring that job when facing the next boss(es). This means each party member needs multiple UNIQUE jobs at 99, each of which are well-geared enough to face down the bosses. If you only have one job geared at this point, you may have difficulty completing this content, so I definitely recommend gearing some others up. Trusts CAN be summoned for these fights, and their strength will be determined by your Moogle Mastery from Sheols A, B, and C. Trusts can even be summoned while in the middle of fighting one of the bosses! However, once a trust is summoned, it CANNOT be summoned again for the duration of the run. To enter Gaol, you'll need three Moglophone II key items, which can be purchased from the Pilgrim Moogle outside the odyssey entrance for 3,000 Moogle Segments each. When you fight a boss, you'll only use up a single Moglophone II, but you still need all three in order to enter. This is one of the main uses for Moogle Segments, and why farming them is such an in-demand activity. While up to three bosses can be fought in a row, most groups only fight one boss and then exit, due to the restrictions on job selection mentioned above. Choosing to fight against three bosses in a row (your party chooses which ones in between each fight) does have a benefit - it "charges" the next Moogle Amplifier for each party member. You don't need to worry about what that does yet, I'll elaborate on it in the Sheol Gaol Rewards section below. Gaol bosses are divided into four tiers, called Atonements, and each boss has many different difficulties available, referred to as Vengeance level. While unlocking new Atonements and Vengeance levels to enter as a party leader requires a fair amount of work, once you have Sheol Gaol unlocked you can fight ALL bosses at ALL Vengeance levels if someone that does have them unlocked is the party leader. I'll still explain how to unlock all atonements and vengeance levels for yourself, but note that it's not required to begin earning rewards. Atonement Tiers Vengeance Levels | |
| Sheol Gaol Bosses | |
|
All bosses in Gaol share mechanics that become unlocked as Vengeance level is increased: V5+ Gaol bosses gain access to SP abilities, which they will use at 75% HP. V10+ bosses will get a random debuff aura when they use an SP ability. The Aura will always debuff a random secondary stat - Attack, Accuracy, Magic Defense, etc. V20+ bosses will summon an additional monster when using an SP ability. The add will always aggro onto whoever has SECOND most enmity - usually this will be the strongest DD in the group - and will also cause the boss to regenerate health if kept too close. Strategies for dealing with the adds vary depending on the difficulty of the boss itself and your party's strategy - sometimes groups put them to sleep, sometimes groups kill them, sometimes they ignore them, etc. These adds do not need to be killed to win the fight, only the primary boss. V25 bosses use an additional SP move at 40% HP, which will also summon an extra add and possibly change the debuff aura. Many bosses will also begin using TP moves back-to-back when below 50% HP - this can lead to VERY deadly combos. If a group is fighting at V15 or harder, it's recommended to always be in hybrid or DT gear to help with survivability. Gaol bosses have a special property where repeated uses of the same Weapon Skill will cause reduced damage. Groups can avoid this by having Melee DD use a variety of WSs, or by focusing on ranged magic setups. Additionally, GEO spells have reduced effects on Gaol Bosses, and the bosses also build up a cumulative resistance to SMN Blood Pacts. GEO and SMN are still viable in these fights, but this means that they're not mandatory / able to ignore bosses with spam. Atonement 1
Atonement 2
Atonement 4 has only one boss - Bumba Beyond these Fetter mechanics, Bumba also has access to a variety of threatening spells and TP moves - it has access to Dispelga, Impact, Kaustra, and Absorb line of spells; has AOE TP moves that can dispel up to 4 buffs, and has multiple AOE damage + knockback moves. It has access to a wide variety of SP moves as well - Invincible, Brazen Rush, Yaegasumi, Elemental Sforzo, and Perfect Dodge. Bumba luckily allows for a decent variety of party compositions to bring down, usually relying on burst damage tactics while avoiding skillchains to stay out of Fetter mode as much as possible. DRG is a popular job choice, as it has several JAs to strengthen the party vs dragons. Bumba has a LOT of HP, especially at higher Vengeance levels, so the primary challenge is dealing enough damage in the strict time limit. | |
| Sheol Gaol Rewards | |
|
For each boss you defeat in Gaol, you'll earn a KI called Augments & RP How do you earn Reinforcement Points (RP) to upgrade the augments? By fighting the corresponding boss, of course! You don't even need to defeat the boss, just damage it. After the fight, whether successful or not, RP will be awarded based on how much damage your group dealt to the boss and the Vengeance level of the fight. Your party needs to deal at least 5% of the boss' max health in order to start earning RP, which will be awarded upon winning the fight or timing out. If you leave the boss arena before winning or timing out, you will not gain RP! So if your party wipes, do NOT warp out or return to home point! RP is earned on a per-boss basis, and you "spend" them at the Pilgrim Moogle in Rabao. You can also spend 1500 Moogle Segments at the Pilgrim Moogle to purchase a Moogle Amplifier]. This works similarly to a Abdhaljs Seal - it's a consumable item that gives the player a buff that will substantially increase the next amount of RP received from Gaol, and wears off after 72 hours. Furthermore, an amplifier can be "charged" by dealing at least 5% damage to three bosses in a single Gaol attempt, which will cause the amplifier to award even more RP. How much RP is awarded, both from a baseline and charge, is based on the Vengeance level of the bosses being fought - both when charging the amplifier and when using the amp itself. This can get kind of complicated, so if you want to know more I recommend reading the page on Moogle Amp.] itself. Aside from Augments, you can also choose to spend RP on Moogle Segments, at a 1:1 exchange ratio, but this generally isn't advised unless you REALLY need segments. All Jobs
Melee DD & Tanks
Mages
Pet Jobs
Ranged Jobs
There is also a wide range of job-specific weapons available, many of which are quite strong. I recommend looking at the Odyssey#Notorious_Monsters_&_Rewards#Gaol rewards page to see if any are relevant to your specific jobs. | |
Ultimate / REMA Weapons
| Ultimate Weapons Overview | |
|
Ultimate Weapons, more commonly known as REMA weapons (Relic, Empyrean, Mythic, Aeonic), are the strongest weapons available in the game. Recently, some have started calling them DREAM weapons, including the newly crafted weapons from Dynamis Divergence. Most of them aren't actually all that difficult to get, but all of them are expensive and / or time consuming to create - usually both. I've waited until near the end of this guide to discuss them for multiple reasons. First, a LOT of players focus on them way too early, and put way too much focus on them. Yes, they are very powerful and will result in a huge performance increase, regardless of your job. However, they aren't mandatory for ANY content in the game. A player who knows their job well and knows the mechanics of the content they're playing will outperform a player with a REMA that doesn't understand those things. I've seen it time and time again, from DDs to tanks to mages. Second, making them is a HUGE commitment of time and money. I've legitimately seen players burn themselves out while trying to create these and not only wind up never doing so, but instead quitting the game entirely. If you do decide to attempt creating one of these, make sure that you pace yourself to avoid burnout. Most of them have multiple steps that can be worked on in any order - if you get burnt out farming for one part of the weapon, work on a different part to shake things up, or just go do something else. How long it takes you will depend on many factors - what specific type of REMA you're making, how much help you receive from friends, how much gil you're willing to spend vs farming items for yourself, etc. For reference, my first REMA (Twashtar, the Empyrean dagger) took me roughly a month of farming on average roughly 2-3 hours a day. Finally, not all REMA weapons are actually, well, worth it. Some are far more powerful than others. Before devoting any significant amounts of time or gil to any one weapon, make sure to do plenty of research to ensure there isn't another option that's better while being easier / cheaper to obtain. I point out some notable weapons in each section, but be sure to do research for your own job! I'm not an expert in every job and their myriad of niches and strategies, so there may be some worth making for your job that aren't pointed out below. If you understand all that, and are still ready to face the challenge, then let's start working on making you a legend. | |
| Relic Weapons | |
|
The original Ultimate Weapons, Relic Weapons were the first ones introduced to the game. For a long time, people just called all ultimate weapons "Relic" weapons, and sometimes they still do. Relics are arguably the easiest REMA weapons to obtain - they're easily soloable, and with deep pockets you can avoid almost any farming and get one fairly quickly. To get started on a Relic Weapon, you'll first need to get the base form to drop from Dynamis. Not Dynamis Divergence, but the original Dynamis. Each weapon only drops from a specific Dynamis zone, so I'd recommend checking the Relic Weapons page to see what zone drops the weapon you're interested in. Once you have the weapon in hand, speak to Switchstix in Castle Zvahl Baileys (I-8) to get started on the process of upgrading it into a real Relic Weapon. Each stage of the upgrade process mostly involves collecting ancient currency, along with some items. The items and currencies vary depending on what weapon is being crafted, but in general:
Upgrading to i119 Note that for all of the weapon skill and NM trials, you'll need to have your relic weapon equipped for it to count - don't forget! Farming Tips The ancient currency can be bought off the AH / bazaars, farmed from original Dynamis zones, and each month you can get currency (both 1 pieces and 100 pieces) from Ambuscade. I recommend taking a combination of all three of these avenues to farm your currency, so you don't burn out on any one farming method. Spend some time farming dynamis and sell off currency you don't need in order to fund currency you do. When that gets boring, farm ambuscade for a bit. Ambuscade has tons of other rewards that you can sell for easy gil too, so that can be used to fund more currency. (Check the prices on Heavy Metal Plates and Riftcinder/Riftdross first.) Notable Relics
| |
| Empyrean Weapons | |||
|
Empyrean Weapons come from the Trial of the Magians system, and involve hunting a variety of NMs and collecting lots of expensive resources. Creating one is a long and expensive process, but is thankfully easy to complete entirely solo. Having a friend or two to help can definitely speed things up, though. To get started, head to Ru'Lude Gardens and examine the Splintery Chest to get your starting weapon. There are a bunch of different weapons in here for different content, so make sure you grab the right one. Once you have your weapon, trade it to the nearby Magian Moogle to get started on the path to making an Empyrean. First phase: NMs.
Second phase: Abyssea
Third Phase: Heavy Metal Plates and Rift items Upgrading to i119 Note that for all of the weapon skill and NM trials, you'll need to have your weapon equipped for it to count - don't forget! Farming Tips Notable Empyrean Weapons
| |||
| Mythic Weapons | |
|
Mythic Weapons are special in that there's a unique one for every job, with the exception of GEO and RUN (who get Ergon Weapons instead). They often provide job-specific buffs and utilities, and can be VERY strong. Of course, they're arguably the most time-consuming REMA weapons to get, especially so for your first Mythic. You can solo everything for your Mythic, but a few parts will be sped up if you have some friends. Preparation An Imperial Heist Duties, Tasks, and Deeds Forging a New Myth Coming Full Circle Upgrading to i119 At this point, you can technically continue magian trials to upgrade to the Afterglow version of your i119 weapon - however, you should never upgrade your weapon directly to Afterglow! It will wind up costing you far, FAR more gil in the long run. Instead, take it down to Oboro in Port Jeuno, where he will upgrade it to i119 for a mere 300 Beitetsu. Congratulations, you finally have a usable Mythic Weapon! Farming Tips Notable Mythic Weapons
| |
| Aeonic Weapons | |
|
Aeonic Weapons are probably the simplest REMA to get, but they are also the only ones that cannot be soloed. They also can be the cheapest, as there are no expensive items to buy thousands of. They are very powerful though, and are notable because they allow players to create the Lv 4 Skillchains of Radiance and Umbra. To get started, first talk to Temprix in Reisenjima. You'll need to turn in Escha Beads - first 10, then 100, then 1,000. After that, you'll be able to purchase a Malformed Key Item from him for a whopping 50,000 beads. This is the biggest straight-up grind in the process of making an Aeonic, and is best done by spamming out Domain Invasion - try inflicting maximally many critical hits, possibly via Evisceration or something similar. Once you've obtained the Malformed Weapon corresponding to the Aeonic you wish to make, then the next step of the process will be to defeat ALL Escha - Zi'Tah Geas Fete NMs. They can be killed in any order, but you must defeat ALL of them before you can continue to the next step. At this point you can probably solo most of them, and depending on your job all of them. Once all Zi'Tah NMs are down, check in with Temprix again. You'll next need to defeat all of the Escha - Ru'Aun Geas Fete NMs. This is harder - the first few tiers are easy enough to solo at this point, but eventually you'll reach a brick wall and need to get some help - probably for Kirin and Warder of Courage. Once all those are down, check back in with Temprix to get your next task. You guessed it, time to defeat all the Reisenjima Geas Fete monsters. The first tier is easily soloable, but beyond that it gets tricky. Once you're at T3 or the HELMs, you'll be hard pressed to solo anything - especially the HELMs. You'll need a very skilled group to take down many of the HELMs, but I've covered those in sections above. Once you've finally cleared all the Reisenjima Geas Fete NMs and check back in with Temprix, he will request a specified Fragment and Attestation item from specific Dynamis Notorious Monsters. Which ones are needed will vary depending on your Weapon, so I recommend checking out the Aeonic Weapon page to see which ones you need. Once you turn those in to Temprix, congratulations! You get your i119 Aeonic Weapon straight-away. No need to work on Magian Trials to upgrade it like other REMAs! It's even already Afterglowed, which will save you another step of grinding compared to other REMA weapons. Notable Aeonic Weapons
| |
| Ergon Weapons | |
|
There are only two Ergon Weapons in the game - Idris for Geomancer, and Epeolatry for Rune Fencer. Both of these are considered nearly essential for their jobs in endgame content - they are extraordinarily powerful weapons. They can mostly be soloed, but they do require completing quite a lot of Delve, which requires at least 3 players to enter. I suggest /yell'ing for people to help you out, as there are likely others that need to farm it as well. To get started on Ergon weapons, though, you'll need to achieve Legend rank in all coalitions in order to even start the relevant quests. This takes three months MINIMUM to achieve, and that's if you do your coalitions as soon as you possibly can. This is a huge roadblock for many people, and it is no easy feat to achieve. I hope you've been working on them like recommended back at the start of the guide! Once you've achieved Legend rank, you can get started on either Saved by the Bell for Idris or Quiescence for Epeolatry. The quests are slightly different, but require collecting similar amounts of resources:
Once you do some final talking to NPCs unique to your quest, then congratulations! You'll immediately receive your ilvl 119 Ergon Weapon, ready to go without needing to mess with any Magian Trials. | |
| Afterglow | |
|
Once you've obtained your i119 REMA, you'll be able to trade it to Oboro in Port Jeuno in order to begin the process of giving it an Afterglow. Afterglowed REMA weapons (also called 119-III versions of the weapon) have better stats than the base i119 versions (aka 119-I), will give nearby party members an Afterglow buff when you use the REMA's associated weapon skill, and will give you a neato glowey particle effect. The process of Afterglowing a weapon is simple but expensive. Oboro will ask for 10,000 of a specific item, depending on your REMA:
Aeonic weapons mercifully bypass the need for these grinds, and will be obtained already fully upgraded to 119-III. | |
| REMA Augments | |
|
The final step of upgrading REMA weapons is Augmenting them. Once your weapon has been Afterglowed, trade it again to Oboro in Port Jeuno to begin the process of augmenting it. This is unlocked in one of two ways:
Once you've fulfilled one of those two objectives, you'll be able to augment as many REMA weapons of that type as you like. For example, if you complete an Elvaan Mask of Light for an Almace, an Empyrean weapon, you won't need to complete a second one for a Twashtar, also an empyrean weapon. To actually make progress on the augments, you'll need to trade the weapon along with either an S. Astral Detritus (worth 10 RP), or an M. Astral Detritus (worth 50 RP). Both of these can be found from Omen and Dynamis - Divergence Wave 3. REMA weapons cap out at R15, requiring a total of 5,960 RP. As a REMA gets augmented, it will gain better and better stats, however they will always require the weapon be wielded in your main hand to apply. Take note that not every REMA needs to be augmented. Some, like BRD's Carnwenhan, are more useful for the utility their unique effect gives, rather than damage. While augmenting will never make a weapon worse, if you don't plan on dealing damage with the weapon primarily then you may not need to spend the gil/effort to do so. | |
| Dyna-D Weapons | |
|
There's some contention over whether or not Dyna-D Weapons "count" as REMA weapons. Some players have started using "DREAM" as a new acronym for Ultimate Weapons to include these. Often called Dyna D Weapons, and occasionally called Su 5 weapons because the player must be Su 5 for the corresponding job to equip them, these weapons are inarguably very very strong. These can ONLY be gained via crafting, so the vast majority of players will instead be purchasing them off of the auction house. They are very difficult to make, and thus will cost a LOT of gil - often so much that attaining one will cost just as much as any other REMA weapon. Dyna weapons are similar to Mythic weapons in that there's a unique one for each of the game's jobs, and they often compliment their corresponding job in unique ways. However, to get the most out of them, you'll first need to augment them. You can begin augmenting your Dyna weapon by trading it to Oboro in Port Jeuno, where he will ask you to choose one of three augmenting paths for the weapon to follow. 'Once you select a path, it will be permanently locked in and can never be changed.' Furthermore, once a path has been chosen, you will be unable to sell the weapon. Make absolutely sure you know which augment path you want for the weapon before selecting it, as there is no going back once you've chosen. Paths A and B are the same for all Dyna Weapons - A will give a 30% chance for double damage and +15 Store TP, B will give a 30% chance for a follow-up attack (that can trigger after normal multi-attack) and +15 Subtle Blow. Both paths A and B also give DMG+11 for the weapon. Path C is unique to each weapon, and usually improves its corresponding job in a unique way. Note that technically the Su 5 versions of the weapons are HQ+2 versions of the craft. There are corresponding NQ (SU 3) and HQ (Su 4) versions of each of these weapons. These can also be augmented in the same manner, but their stats are overall lower than the "ultimate" Su 5 versions. It is worth considering them, though, as they are significantly cheaper than their Su 5 counterparts. Notable Dyna D Weapons
| |
Other Content
| Vagary | ||||||||||
Vagary is an event that is fairly complicated, but luckily you don't need to know a ton to begin participating in it. There are three different raids that can be chosen, called Gates. Each gate has different enemies, bosses, and mechanics, which can sometimes be fairly complicated. There are also a few secret bosses, and encountering them can be quite tricky. Vagary's difficulty does not scale with the number of players participating. However, the content isn't particularly difficult for a party of 6 (or often even just a party of 3 or 4) so if you're in a full alliance you may wind up just sitting around while 2-3 mages clean out the enemies. You should know your job's role well enough by now to figure out what you should be doing at any given moment, but don't be surprised if you're doing a lot of waiting during Vagary. Gunna be honest, Vagary can be pretty boring for some jobs. Note! - There are RoE Objectives for each Vagary boss, BE SURE YOU SET THEM BEFORE ENTERING VAGARY! It's super easy to forget doing this, but they give good rewards! I'll detail them later on, but I wanted to call this out now. Entering Vagary
| ||||||||||
| Delve | |
|
Delve is content from Adoulin's endgame. Requiring at least 3 people to enter, Delve is a run through a dungeon fighting bosses eventually leading up to a final boss. The gear dropped from Delve is mostly outclassed now, but there are a handful of useful pieces for some jobs. Some of the crafting material drops can also fetch a good price on the AH. Overall it's not too difficult, and most i119 players can meaningfully participate in it. | |
| Voidwatch | |
|
Voidwatch, also called VW (not to be confused with Voidwalker NMs) is a questline based around spawning and killing a series of NMs. These NMs are generally very easy for all i119 players, though some of the later ones can prove tricky until you get some better gear. The gear they drop is generally outclassed except for a handful of pieces - instead, they're farmed because they can drop items that are worth selling on the AH, particularly Heavy Metal Plates, Riftdross, and Riftcinder. They can also drop Pulse Weapons, though extremely rarely. The drops rates for these items are generally very low outside of monthly campaigns that boost "light" values. Overall you won't need to concern yourself much with Voidwatch, so I won't go into much detail here. Please read more on the Voidwatch page if you're interested. | |
| Master Trials | |
|
Master Trials are the hardest content the game has to offer. There are only a handful of them, but they are EXTREMELY difficult and will require the best of the best equipment to clear. However, their drops are purely cosmetic trophies, offering no "real" rewards. I won't go into strategy details here because each one requires very specific strategies, but if you feel up to a challenge it's worth checking these out. | |
What Next?
| So, what should you do now? | |
| Well, at this point, you've successfully completed all of the endgame content that FFXI has to offer! You finally get to stop playing the game!!!!!! Or, y'know, you can do it all over again on another job, or help new people do it their first time through. You're the expert now! Good job! | |
Contact
If you have any questions, comments, or feedback on this guide or any of its contents, please feel free to contact the main author here on the BG Wiki at User_talk:Cassiani (or /tell in-game: Cassiani on the Asura server.)