Category:High-Tier Mission Battlefields/TheOrb'sRadiance
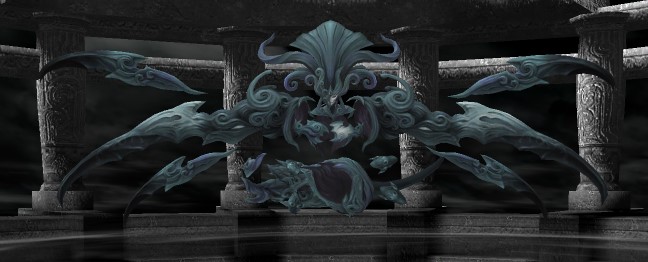
|
Very Difficult
MNK/war - Normal DD job abilities. MNK melees in hybrid DD gear, nothing major.
RDM - Full debuff on Cloud of Darkness. Full buff on everyone.
WHM - Heal as usual, nothing fancy. Be careful to be in DT gear and be SIRD capped to be safe.
BRD - Honor March, Blade Madrigal, Valor Minuet V, Valor Minuet IV, Herculean Etude.
COR - Chaos / Sams
THF - TH slave
MNK is the only one to engage, other than the THF to build Treasure Hunter, but be careful not to feed too much TP. Remember to turn when she uses her glowing red eyes. If adds pop, just fight through them. They'll go to the healer probably, so just be careful to be in DT gear and be SIRD capped to be safe.
Fight should be around 6minutes~
Orangebear (talk) 02:31, 11 January 2025 (GMT)
Kiting Strategy
Cloud of Darkness is extremely vulnerable to kiting strategies. She will not auto-attack or use any TP moves if the player with hate is more than ~20 yalms away from her. If kited properly, she can be killed in a couple of minutes with absolutely no risk.
Jobs: PLD, RDM/DRG, THF/DRG, DD/DRG, BRD, COR
- PLD needs a competent enmity set for Flash. Movement speed gear is useful but not required.
- RUN can probably be substituted without issues, but PLD can help heal if the fight goes south.
- RDM needs a very good enfeebling set (Empyrean +3 preferred) with high Enfeebling Magic Effect/Duration.
- All DDs use /DRG to help control enmity. The fight will go south fast if Cloud of Darkness ever turns around.
- Schere Earring recommended if available.
Strategy:
- On entry:
- RDM: Haste II, Phalanx II on everyone. Refresh III on self, PLD, and any DDs with Schere Earring access.
- COR: Typical physical rolls, Crooked Chaos/Sam.
- BRD: March, Minuets. Dirge on DDs (very important), Ballad on PLD.
- On pull:
- PLD: Do not engage (Atonement is unnecessary). Flash on pull, then run across the arena through Cloud of Darkness while the RDM lands Gravity. Once Gravity is on, kite Cloud around while continuing Flash. Always stay 20+ yalms away.
- Cloud's movement is very awkward when inflicted with a high-potency Gravity, so be careful. She will generally gravitate to the middle of the arena.
- RDM: Saboteur, Spontaneity Gravity II (in case of resist/Immunobreak), Silence (one or two Immunobreaks required), Dia III.
- Frazzle will not land without Stymie; Distract is difficult but not impossible. Best to skip both.
- Wait to engage until after RDM is finished enfeebling. This gives time for PLD to get some hate.
- After kiting starts, zerg with weapon skill spam. Everyone with /DRG should use High Jump and Super Jump proactively to control their enmity generation.
- PLD: Do not engage (Atonement is unnecessary). Flash on pull, then run across the arena through Cloud of Darkness while the RDM lands Gravity. Once Gravity is on, kite Cloud around while continuing Flash. Always stay 20+ yalms away.
If done properly, Cloud of Darkness will never use a single TP move, and thus will never absorb damage/buffs or spawn Fomor adds.
Septentaru (talk) 05:43, 22 October 2025 (UTC)
Difficult
Add your contribution here!
Normal
Add your contribution here!
Easy
Duo DRK and WHM, E.
Attempted this blind as DRK, R0 Caladbolg/Sakpata with a decently geared WHM. Trusts were Sylvie/Ulmia/Koru/Selh. Selh died pretty quick on pull, the rest survived soon as I was able to pull CoD away.
Despite the obvious resistance to Drain (cause.. cloud of DARKNESS), the fight was going very well. Until around 61% that is, when she spawned 3 volto's within 30 seconds - Galka Galka Mithra. I don't know what triggered this, there wasn't 3 subsequent TPs moves or spells used.. they just started popping into existence. They hit fairly hard upwards of 250 on the trusts and WHM, and they gain TP fast.
https://www.ffxiah.com/forum/topic/58159/cloud-of-darkness-htbf
BLU Strategies
Solo'd with trusts on E difficulty as BLU/WAR using the following strat:
Take boss to 80% HP at which point it will use Primordial Surge, subsequently, a red light will shine on it's head signaling that it is absorbing either physical or magical damage; as for now there is no known determinant for which damage type is chosen. At this point you can choose to continue damaging it if it is not absorbing your primary damage type, but do note that if it is not absorbing physical, it can still absorb skillchain damage so adjust your WS's accordingly. I chose to spam Savage Blade for this fight. It will end it's absorption phase with the use of Waning Vigor, which will unleash the stored absorbed damage back onto the player. I did note that this ability seems to be able to be kited. It looks like it spawns as a hitbox in front of the boss, and if you're not in that hitbox you won't take damage from it. More confirmation is needed.
After this first cycle of Primordial Surge and Waning Vigor, every single one of the bosses TP moves will begin spawning the Fomor adds. What I noted is the boss is capable of spawning a total of 6 adds throughout the fight. So what I did is I kept the boss above 50% HP so as to reduce the frequency of his TP usage (as below 50% and 25% HP enemies will use TP moves more frequently) and I proceeded to focus kill every Fomor enemy as they spawned - with this strat, you should not see more than one at a time provided you aren't feeding TP to the boss. Once I killed 6, I proceeded to push the boss below 50% HP and noted that it's TP moves no longer spawned any adds. At this point the fight is essentially just tank and spank. I subbed WAR just for provoke as the fomor enemies target the second player on the threat list and they tend to WS right off the bat, which results in a one shot on most non tank trusts, so I wanted a quick way to draw their attention.
Entire fight took 21min total, I am a Tizona BLU with Empy+3 however I mostly stuck to Naegling this fight. Trusts used: Ulmia/Jaochim, Koru-Moru, Apururu (UC), Selh'teus
Goldeagle (talk) 09:11, 2 February 2025 (UTC)
MNK Solo
I accidentally entered without my WHM mule and soloed this with trusts on E difficulty as MNK/DRG with August, Sylvie (UC), Arciela 1, Ygnas, and Monberaux during a trust campaign. Took 12 minutes and I got lucky with magic/magic/physical surges. As explained elsewhere, Cloud of Darkness uses the first Primordial Surge after 75% HP (if the target is in range). After that completes, it uses Waning Vigor and says "Gather..." The next 5 or 6 TP moves (on easy) will summon relic Fomor adds (I thought 5, but the above post says 6). All have access to relic WSs and can skillchain.
- race - relic - aura (debuffs can be removed except avoidance down)
- galka - h2h - virus or plague
- mithra - katana - def down
- hume F - gkt - magic attack down
- hume M - gkt - magic attack down
- taru ? - scythe - avoidance down?
- elvaan F? - sword/shield? - atk down?
- elvaan M - GA - atk down
CoD info:
- CoD uses Primordial Surge at 75%, then starts to glow red and absorbs either magical or physical damage.
- If it absorbs too much damage during surge, it uses Expunge instead of Waning Vigor at the end of the Surge period, which can kill a tank.
- Otherwise, it uses Waning Vigor
- Either way, it says "Gather . . ." and the next (5 or 6 on easy?) TP moves will spawn an add
- After some amount of time, uses Surge again
Fight info:
I used Boost for 1600TP and used JAs before engaging. I kept Chi Blast and buffs up throughout the fight as possible, using Perfect Counter before WS on adds when available. I positioned August on one side of CoD and myself/the other trusts on the other by running slightly past the NM before punching it for the first time.
For the fight, I started with a 3k TP Shijin Spiral -> Victory Smite -> jump / high jump -> Victory Smite for Radiance and it was down to ~80%. At that point, I switched to Howling Fist (Godhands) and it Primordial Surged for the first time. Super Jumped hate back to August and melee / Howling Fist'd it down to 60%ish before Waning Vigor. Each time it spawned an add, I'd quickly switch to it, pull it to August to not mess up positioning, and take it down ASAP. I got a unlucky with multiple attack down Elvaan adds, but avoided having two up at the same time. Ygnas and Monberaux kept everyone up, although Ygnas and August were running a bit low on MP by the end. The last surge was physical, but CoD was at 3% HP or something so I switched to Formless Strikes and just meleed it to death. If the fight had lasted another 2 minutes, I probably would have been in trouble due to lack of MP.
August tanked most of the fight thanks to Super Jumps and a bit of strategy. Strongly pulling hate early makes him use all his recasts to try and rip hate back, which built up a lot of cumulative enmity and made CoD's focus on him much more stable even when we were killing adds. --Byrthnoth (talk) 13:09, 23 April 2025 (UTC)
Very Easy
COR can solo with trusts. Ignore adds, SB it to death. Similar to Lilleth farming.
Can solo as blu/war with Savage Blade, would recommend killing the Taru and the Elvaan adds as they slow your damage down significantly.
The adds resist dream flower(as expected), Magic hammer works well on the boss for getting mp back.
Taru -> Encumbrance
Mithra- > Defense Down
Galka -> Plague
Hume -> Magic Attack down
Elvaan -> Attack down
Also solo'd as Cor/War, Mnk/war, and Blu/War. Blu kills the fastest with runs being 6-14 mins (Sometimes it died without summoning ads)
Trusts: Joachim, Ulmia, Koru-Moru, Ygnas, Monberaux
RDM Solo
Trusts
- Apururu / Selteus / Mon / Arciela / Joachim (Not too important besides having Joachim and enough healers to help keep everyone alive, Apururu also isn't mandatory, I just like her Unity so use her.)
Gear
- M.Level 30 with DNC subbed (doesn't matter if NIN - you most likely won't need this many master levels).
- Naegling and Thibron as main weapons, (had Crocea/Daybreak but noticed I didn't need it after some runs.)
- Nyame R15 and some WSD JSE, usual capes, malignance for TPing and DT (lesser gear may increase time.)
- Had decent +2/+3 Relic and AF for buffing, enfeebling, MACC, etc.
- Less crucial but had Empy +2, didn't need to enfeeble much besides Dia 3; the magic damage from the set helped a little for magic-weakness but you can live without this completely, it was miniscule damage compared to savage blade spamming.
Strategy
- Began by buffing everyone with Haste 2 + Phalanx 2, Refresh 3 on mages.
- Buffed myself as usual with Haste 2, Gain-STR, Temper 2, Phalanx, Refresh 3, Shell 5, Protect 5, Aquaveil, Bar-Silence and Bar-Thunder. No enspells. Some of these are just there to buff Naegling and don't carry a huge influence over the fight.
- Pulled with Dia 3 and debuffed with Distract 3. At first Paralyze stuck, but it wasn't reliably landing so I mostly fought through with Dia 3 on. I had Impact but didn't bother.
- During some earlier runs I used Crocea and Thibron/Daybreak with enspell and elemental WS but I had some problems with this:
- Savage blade was just too good at stealing and maintaining aggro, elemental weapons didn't have the same effect.
- It's easier to look at one damage type during Primordial to see if your autos are getting drained or not.
- Anyway, just spammed savage blade mostly.
- Whenever it began casting primordial and the gem glowed bright red, I got out of auto-lock and slowly tested my hits to see what's draining. I did this by either auto-ing a few seconds; if it said CoD was getting HP I knew magic worked, if autos did no drain, I knew I was fine to spam savage blade, if magic worked, I would intermittently cast tier 3 spells while walking around, waiting for the phase to end. If I was super unsure I would cast a weak fire to test too while facing away. I also use gravity during Primordial just so it's easier to keep a distance as it's about to finish its primordial/gem-glow phase with the waning ability which gives weakness. With this, it's easy to walk away until it finishes its cast. You can get a few WS in and then begin walking away until it casts waning, etc.
- It occasionally spawns adds which run to a healer, and can spawn sneakily sometimes where you don't notice. One of my runs had Apururu getting wiped because I didn't realise this. Either way, the goal is to just begin savage spamming them after Dia 3 while tanking CoD and the add. The damage over the fight should keep CoD on you with enmity. Once the add is out, return to spamming savage blade on CoD.
- Keep up Dia 3 as necessary, if you feel a bit overwhelmed you can try more debuffs until they work, and also debuff the adds further (though I preferred just killing them ASAP.)
- You may use enspell for more damage but I felt on Naegling it wasn't worth it, especially since it would make the log harder to read. For those using Crocea, you can potentially use it and get rid of enspell if during primordial phase it's physical weak, and turn it back on again (though in those cases you may as well use Naegling for more damage). I didn't have an enspell 0tp set but that would potentially work well when it's weak to magic, I saw Darvin Krosherok on Youtube do this a few times on his N/D runs, though his intention was also to inhibit TP and therefore prevent adds from spawning too.
- That's it, just make sure you keep an eye on primordial and adds as they trigger/spawn and handle them as necessary, otherwise it's an easy savage blade spam fight. It may take a bit of time.
TLDR = SB spam the boss, and adds as they spawn, with a golden rule of respecting the Primordial mechanic.
I found it a little tricky to understand this boss and how to fight it while respecting its mechanics so wasted a few runs experimenting even with specific guides out there, and I feel this worked well. Feel free to ask if you have any questions.
Uploaded a slightly messy PoV here which can be templated for any physical damaging job: https://youtu.be/pp1zoq8YLNM
SCH solo (Kiting / Helix strategy)
This strategy is applicable to all difficulties, with higher difficulties requiring better gear.
Cloud of Darkness is very vulnerable to kiting due to her movement speed/pathing and because most of her attacks are self-targeted. With +18% movement speed from something like the Shneddick Ring, she is stuck casting magic on you if kited properly. Additionally, any auto attacks she does get in on you can be reduced to very low damage with Phalanx / DT equipment, and her TP gain can be negated with Stoneskin.
Setup
- SCH99/RDM49, 200JP. Daybreak/Bunzi's Rod, mix of Empyrean +1/+2, Nyame R0, and Jhakri +2 for gear.
- You will want a source of +18% movement speed for this fight. Shneddick Ring is probably the easiest to maintain and fit into your gearsets. Any lower and you may not be able to kite without Gravity.
- Also make sure you idle in full Damage Taken equipment.
- Some players also seem to suggest /NIN, trading Phalanx and Haste in exchange for shadows to block Absorb-Attri. YMMV.
- Trusts: Star Sibyl, Brygid, Moogle, Sakura, Kuyin.
- Only passive trusts for this strategy. Anyone else will just feed TP and mess up your kiting.
- Ate Rolanberry Daifuku.
- Upon entering: Light Arts, Sublimation, Perpetuance Haste, Perpetuance Phalanx, Regen, Protect, Aquaveil, Stoneskin, Perpetuance Aurorastorm II, Klimaform.
- Your choice of weather may vary depending on your gear. More on that later.
- Unlike other 0-TP strategies, it's okay to run Phalanx. Cloud of Darkness absorbing Phalanx is no big deal, since our main source of damage is Helix spells.
- Don't Perpetuance Regen in case she absorbs it. You may want to use a lower-tier Regen spell just in case. Regen is mainly here to cover Sublimation damage - you shouldn't be taking much, if any, from Cloud of Darkness.
- DO NOT CAST Shell. If Cloud of Darkness absorbs it through Primordial Surge or Absorb-Attri, you immediately lose your main source of damage.
- Cloud's magic is potent on higher difficulties, but if you are kiting properly, you can outrange her almost every time.
Strategy
The ultimate goal in this fight is to ensure Cloud of Darkness never summons adds.
Upon hitting 80% HP, Cloud of Darkness will immediately use Primordial Surge (regardless of her current TP), followed by Waning Vigor approximately 1 minute later. After this use of Waning Vigor, Cloud of Darkness will summon a fomor enemy upon using any TP move. Each fomor enemy has a different job, relic weapon, and associated aura, but they're all terrible to deal with and can easily murder you.
Your choice of helix element to use in this fight may vary depending on your equipment.
- Cloud of Darkness's highest elemental vulnerability is Light, at 70% affinity. Paired with Daybreak and its Light affinity boost, Luminohelix (II) is probably your best source of damage.
- Cloud of Darkness's next highest vulnerabilities are Fire, Thunder, and Wind, at 60% affinity. Of these, Wind (Anemohelix (II)) with the Marin Staff +1 is probably the best option.
- Alternatively, if you have the equipment to free nuke Helix spells for 10,000+ damage, element choice doesn't really matter.
- Kaustra is useless due to Cloud of Darkness's 5% Dark affinity.
The major difference between difficulties in this strategy is how you land your Helix spells.
If you do not have the gear to free-nuke 10,000 damage Helix spells, you will need to Immanence self-skillchain and burst your Helices to reach the DoT cap. This requires two extra nukes in addition to the Helix you cast, which poses a problem for Cloud of Darkness's TP gain. If you cast too many nukes, she will eventually use a TP move and summon an add.
On Very Easy, as long as your bursted Helix spells hit for near 10,000 damage, Cloud of Darkness will not be able to summon any adds. On higher difficulties, the extra TP feed from skillchaining combined with Cloud of Darkness's increased HP pool/magic defense may eventually cause her to use a TP move, so you will need to free-nuke.
Be aware that some of Cloud's auto-attacks cause knockback and can easily interrupt your spellcasting. If you have capped Fast Cast, this shouldn't be an issue in most cases (just time your spell casts accordingly). If you do not have capped Fast Cast, or you are self-skillchaining, make sure you lodge yourself in a corner on the edge of the arena before casting magic. While you will still take the knockback, your casting will not be interrupted because the knockback did not move you anywhere.
After entering and buffing/summoning trusts, walk in and whack Cloud of Darkness with any Treasure Hunter gear you have, then prepare to land a capped-DoT Helix spell. In my case on VE, I lodged myself in a corner, then used the following sequence: Immanence -> Fire -> Immanence -> Thunder II (Fusion) -> Ebullience -> Luminohelix.
Once you have landed a capped-DoT Helix on Cloud, begin running around the edge of the arena. With +18% movement speed, Cloud will begin to lag behind you, and eventually anchor around ~20' away from you. She can't auto-attack you at this distance, and will occasionally stop to cast some nukes. When you see a nuke cast, do your best to run ~30' away to outrange it, then begin kiting again.
Try to land another max-power Helix right before 80% HP. This will ensure that Cloud is taken as far as possible into her "add-summoning" phase before you're forced to feed her TP. Don't nuke during her damage absorption (between Primordial Surge and Waning Vigor).
Make sure that Stoneskin and Phalanx (or Utsusemi if you are using that) are up at all times in this fight. Every point of TP Cloud gets from auto-attacking you reduces your margin for error and increases the chance she'll summon an add. Similarly, make sure your Storm spell and Klimaform are up before you fire off any nukes.
If you're feeling pressured or need to get critical buffs up, Cloud of Darkness is vulnerable to both Gravity and Silence. Gravity should generally always land (pending your magic accuracy), but Silence will likely require Immunobreaks.
Note that if you apply Gravity to her and kite her for too long without taking any actions on her, Cloud of Darkness may actually become passive and begin returning to the center of the arena. Like any deaggro'd enemy, this will not clear her Helix DoT, and can give you some time to relax while her HP ticks down. However, there are important caveats to note:
- Deaggro clears Treasure Hunter. If you are using Treasure Hunter, you will need to reapply it before continuing the fight.
- Once all DoTs on Cloud of Darkness wear off, she will start to regenerate HP if left unclaimed. Make sure you're ready to aggro her and reapply Helix when this happens.
- If Cloud of Darkness dies while passive, you will not get loot. Make sure to keep her claimed near the end of the fight!
If the worst case scenario happens and Cloud of Darkness summons an add, don't panic! The fomor adds are also vulnerable to Gravity and Bind (though Bind requires Immunobreak), and you can still win as long as Cloud is close to death. Simply apply Gravity to the add and continue kiting. Adds will pose a bigger problem if you are magic bursting your helices, since Gravity won't be enough to prevent them from reaching you during your skillchain. Make sure Aquaveil is up at all times to hopefully prevent a spell interruption.
Continue kiting and firing off Helices until Cloud is dead. In my gear, my bursted Luminohelix consistently dealt ~9750 damage. 4 of these (approximately 3 minute duration each), with an extra free-nuke at the end of the fight, was enough to kill Cloud of Darkness in my experience on VE.
Good luck! I found this strategy, even with my undergeared/underCPed SCH, to be much easier and more consistent than using my much-better-geared RDM, BLU, or THF.
--Septentaru (talk) 19:25, 1 June 2025 (UTC)
This category currently contains no pages or media.